10 Tips in Real Estate Photo Editing for Beginners

Real estate photography plays a vital role in modern property marketing. High-quality visuals attract more potential buyers, increase listing engagement, and create a strong first impression. However, good photos do not come solely from the camera. Real estate photo editing is equally essential, helping transform raw images into polished, professional, and market-ready visuals.
For beginners, editing may seem intimidating. Although the process involves several technical steps, learning the essential techniques gradually builds confidence and skill. This guide covers 10 fundamental real estate photo editing tips – complete with structured subheadings – to help beginners produce clear, bright, and appealing property images.
I. Why Real Estate Photo Editing Is Essential
Real estate photo editing enhances the visual accuracy and appeal of a property. It corrects lighting inconsistencies, improves clarity, and ensures each image reflects the space authentically. Moreover, professional editing strengthens your brand identity by creating a consistent look across all listing photos, ultimately making the property more attractive to buyers.
II. 10 Real Estate Photo Editing Tips for Beginners
1. Master Exposure and Light Control
Exposure influences how spacious, welcoming, and accurate a room feels. Poor lighting is one of the most common issues in property photography. Therefore, correcting exposure is a crucial first step.
- Brighten dark or underlit areas: Rooms with limited daylight often appear smaller and duller. Lightening shadow areas can dramatically improve the mood and visibility.
- Reduce intense highlights: Window glare or reflective surfaces can overpower a photo. Softening highlights reveals more detail on both the interior and exterior.
- Balance contrast carefully: Moderate contrast adds depth and separation between elements while maintaining a natural look.
- Apply selective exposure adjustments: Instead of altering the whole image, adjust specific areas that are underexposed or overexposed.
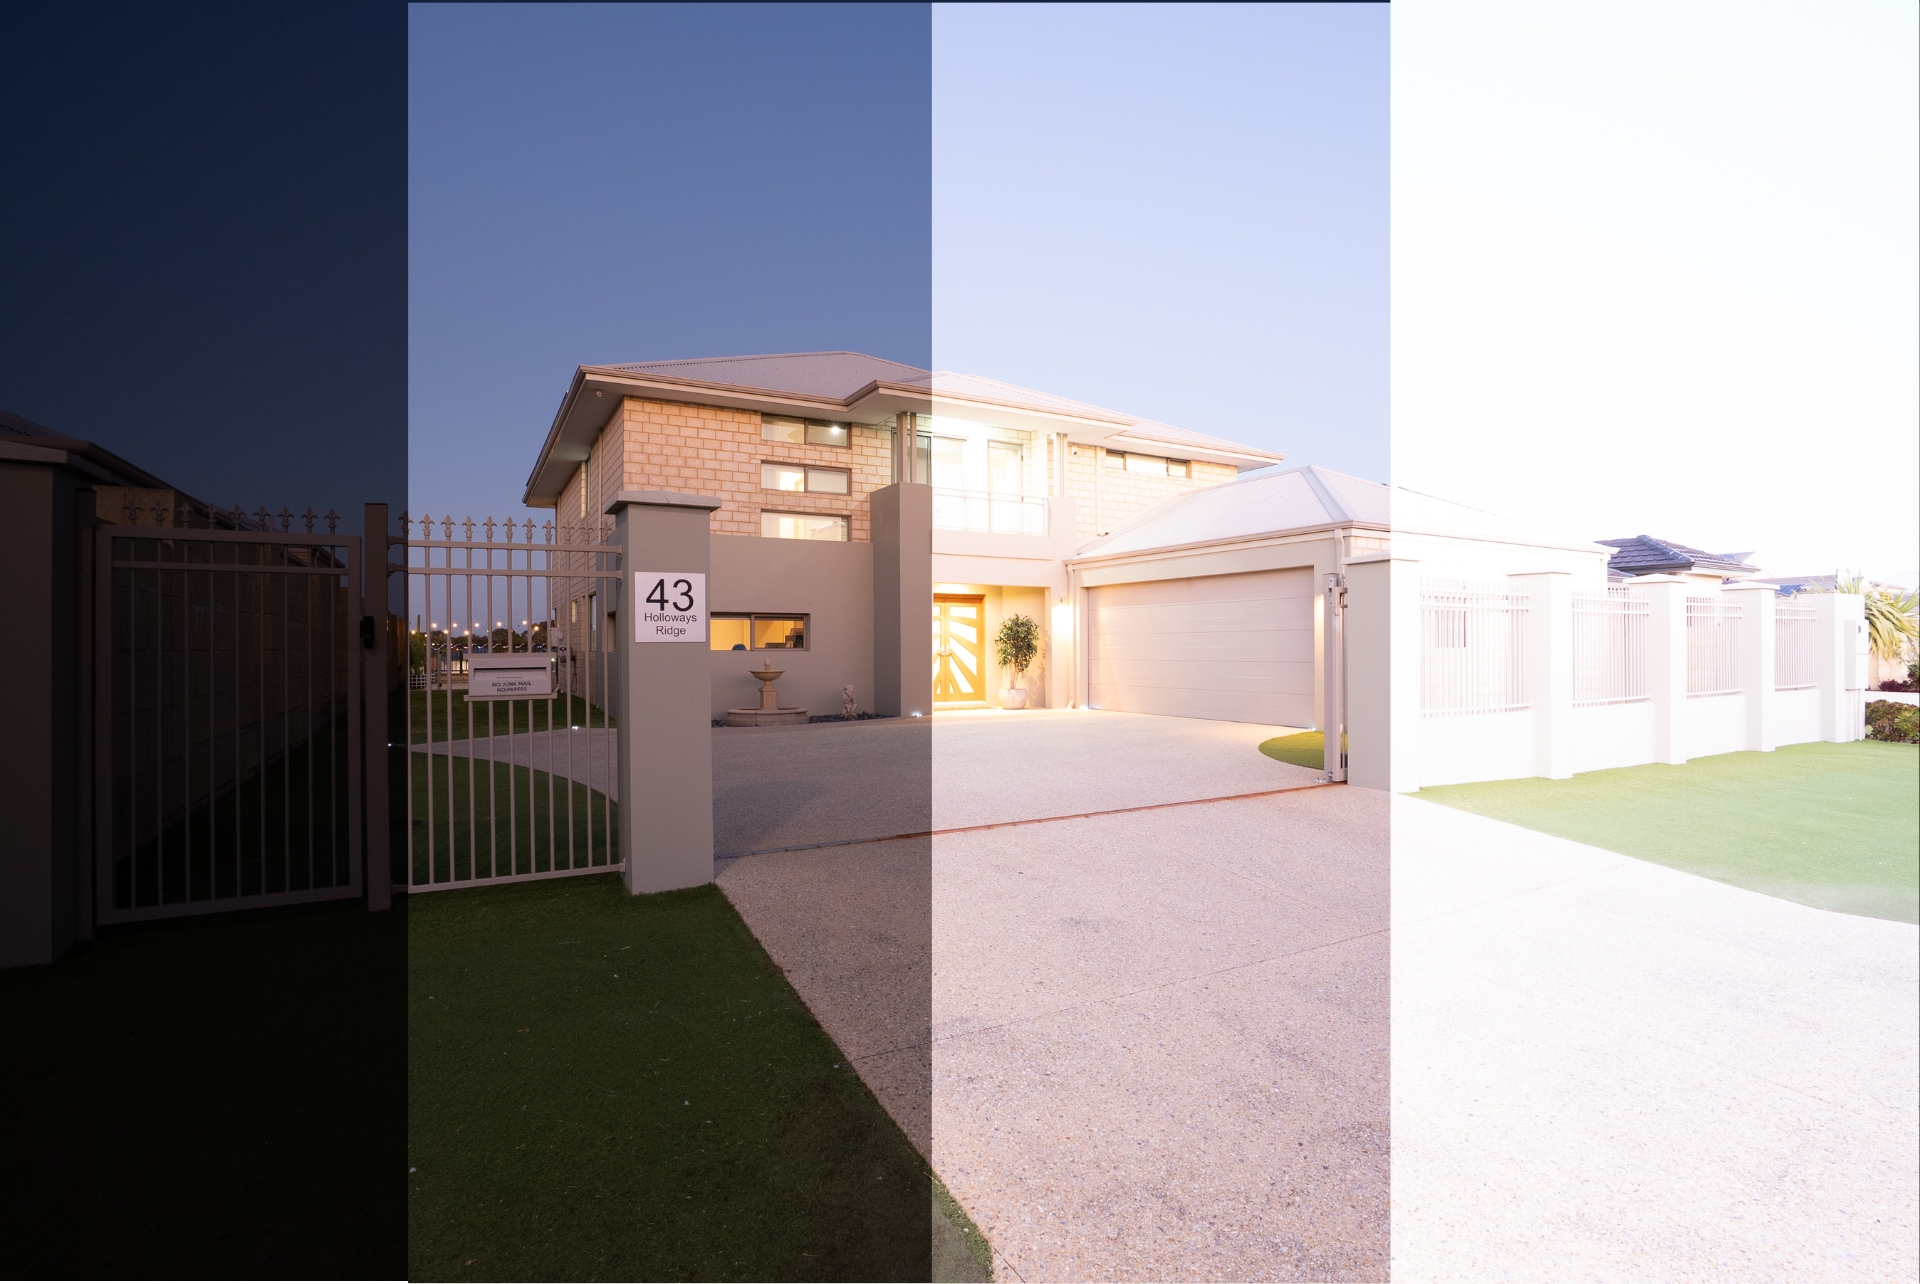
2. Correct White Balance for True-to-Life Colors
White balance determines how warm or cool a photo appears. However, mixed indoor and outdoor light often confuses camera sensors.
- Fine-tune temperature and tint: Adjust these settings until whites look true and natural.
- Maintain consistent color tones: A single listing should not jump between yellow, blue, or green hues.
- Use neutral surfaces to guide your correction: White tiles, ceilings, or countertops make excellent reference points.

3. Enhance Sharpness and Detail
Real estate buyers want clarity. They notice textures, finishes, and small architectural elements. However, oversharpening can ruin image quality, so balance is key.
- Apply controlled sharpening: Moderate sharpening helps define edges without introducing noise.
- Use selective sharpening on key features: Apply extra clarity to cabinets, countertops, and other focal points.
4. Fix Perspective and Vertical Distortion
Wide-angle lenses are essential in real estate photography, but they often distort walls and lines.
- Apply lens correction profiles: These automatically fix common distortions created by specific lenses.
- Straighten vertical and horizontal lines: Walls, door frames, and windows must appear straight and stable.
- Adjust perspective manually if needed: Fine-tuning helps achieve precise and natural-looking geometry.

5. Improve Composition Through Cropping
Composition guides how viewers interact with your image. In addition, cropping removes distractions and enhances balance.
- Use the rule of thirds to frame key features: This makes the room feel more open and visually appealing.
- Remove distracting edges: Trimming unnecessary objects increases clarity and focus.
- Avoid over-cropping: Real estate images require space; tight crops can make rooms feel smaller.

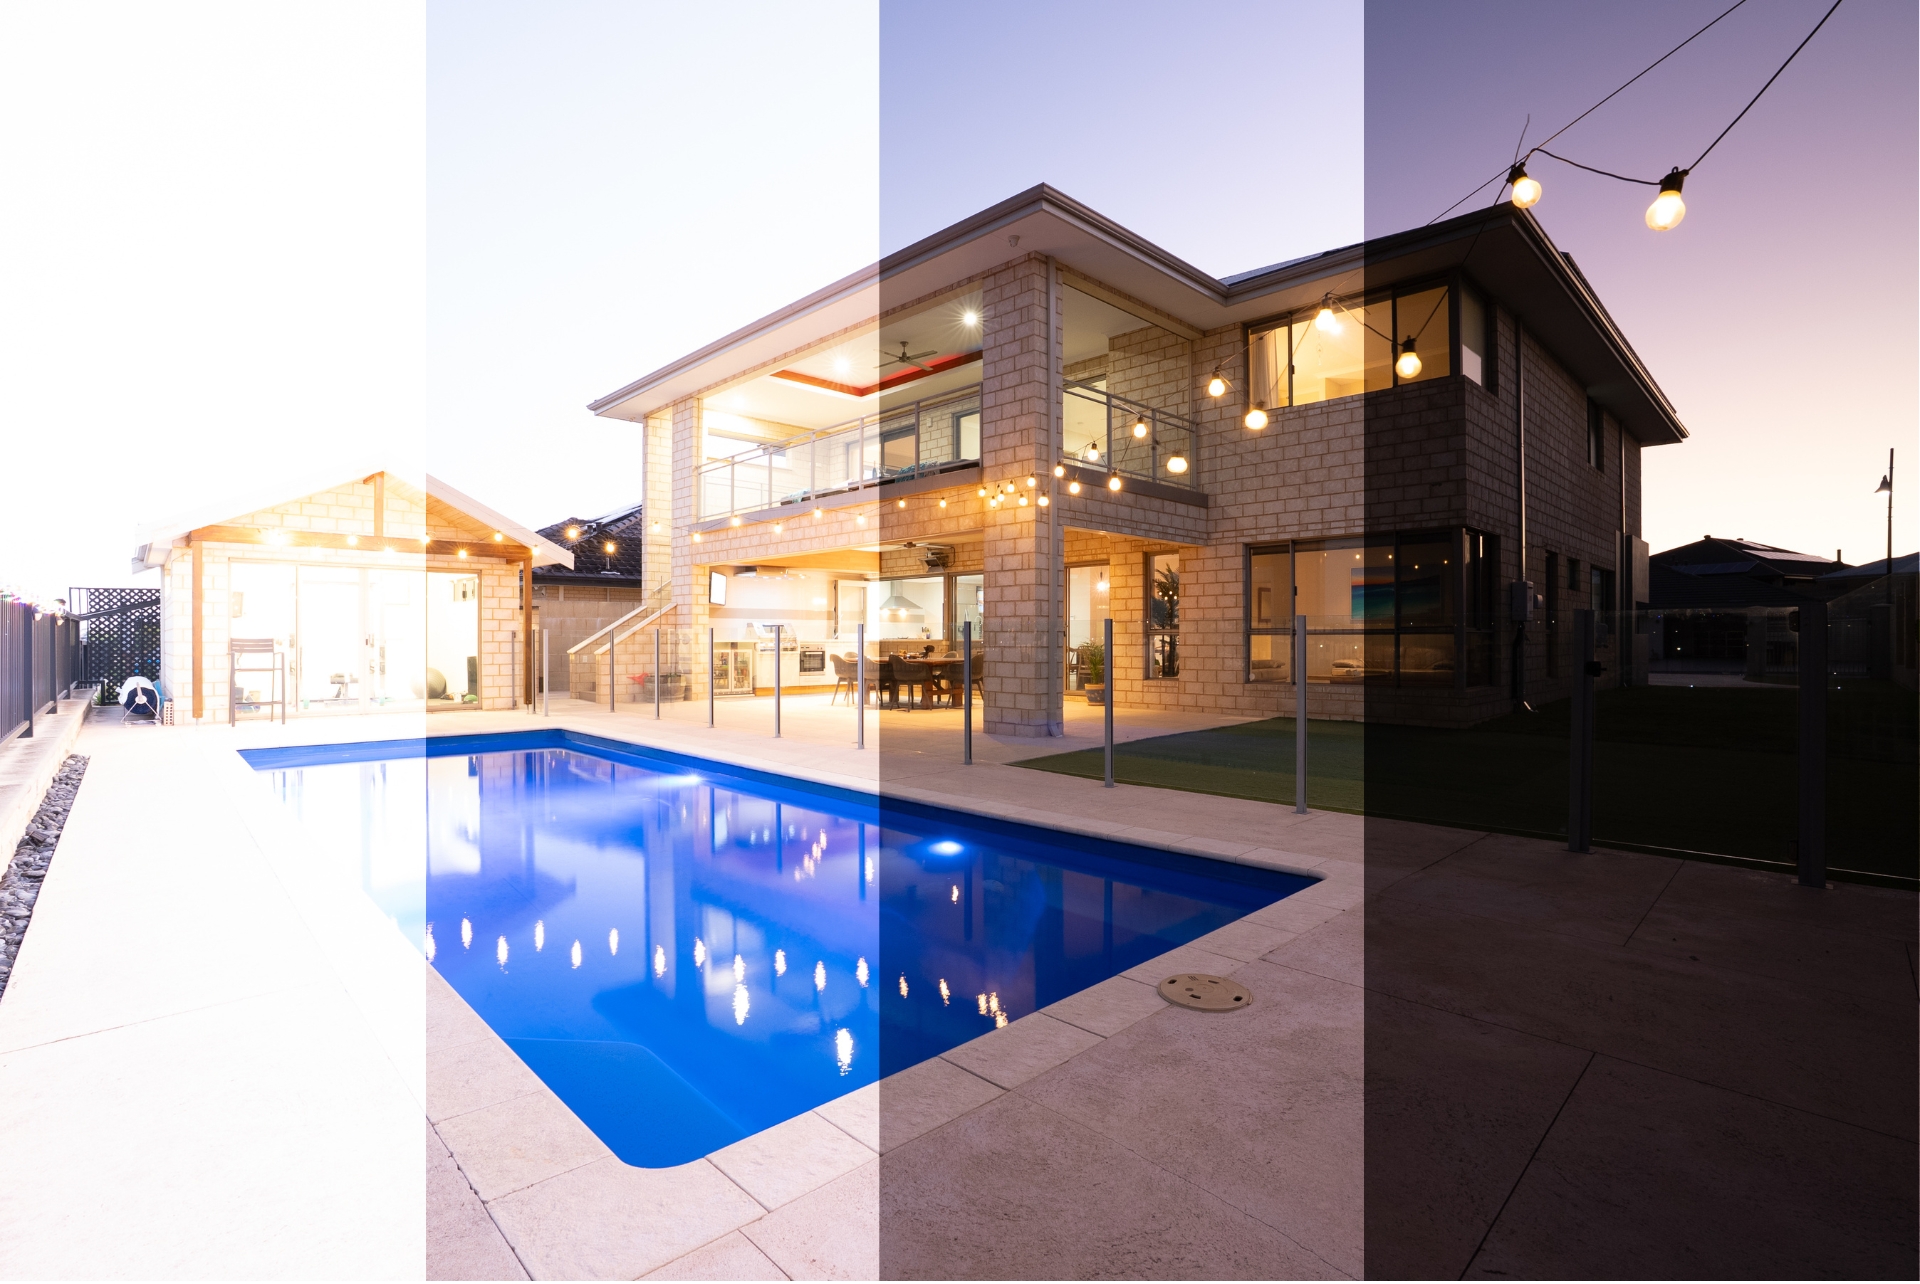
6. Balance Interior and Exterior Lighting with HDR
Capturing both indoor details and bright outdoor views can be challenging. Although the human eye adjusts easily, cameras do not.
- Merge multiple exposures: HDR blends underexposed, regular, and overexposed shots.
- Control HDR intensity: Subtlety is key, too much HDR looks artificial.
- Preserve window views: Capturing outdoor scenery elevates the photo’s sophistication.
- Adjust contrast after combining exposures: This helps maintain a natural, cohesive look.
7. Remove Minor Imperfections Carefully
Retouching improves the clarity and professionalism of your images. However, avoid altering permanent features.
- Remove dust spots and smudges: These small fixes can drastically improve photo cleanliness.
- Edit out temporary clutter: Cords, small stains, or distracting reflections can be removed safely.
- Maintain ethical accuracy: Misleading edits damage credibility, so avoid altering structural flaws.
8. Enhance Color Vibrancy Without Overdoing It
Color sets the mood and influences how buyers perceive the space. However, oversaturation quickly makes photos look fake.
- Increase vibrance gently: This boosts softer colors while preserving realism.
- Enhance outdoor blues and greens: Livelier skies and lawns create stronger curb appeal.
- Maintain color consistency across the set: This strengthens your brand and improves visual flow.
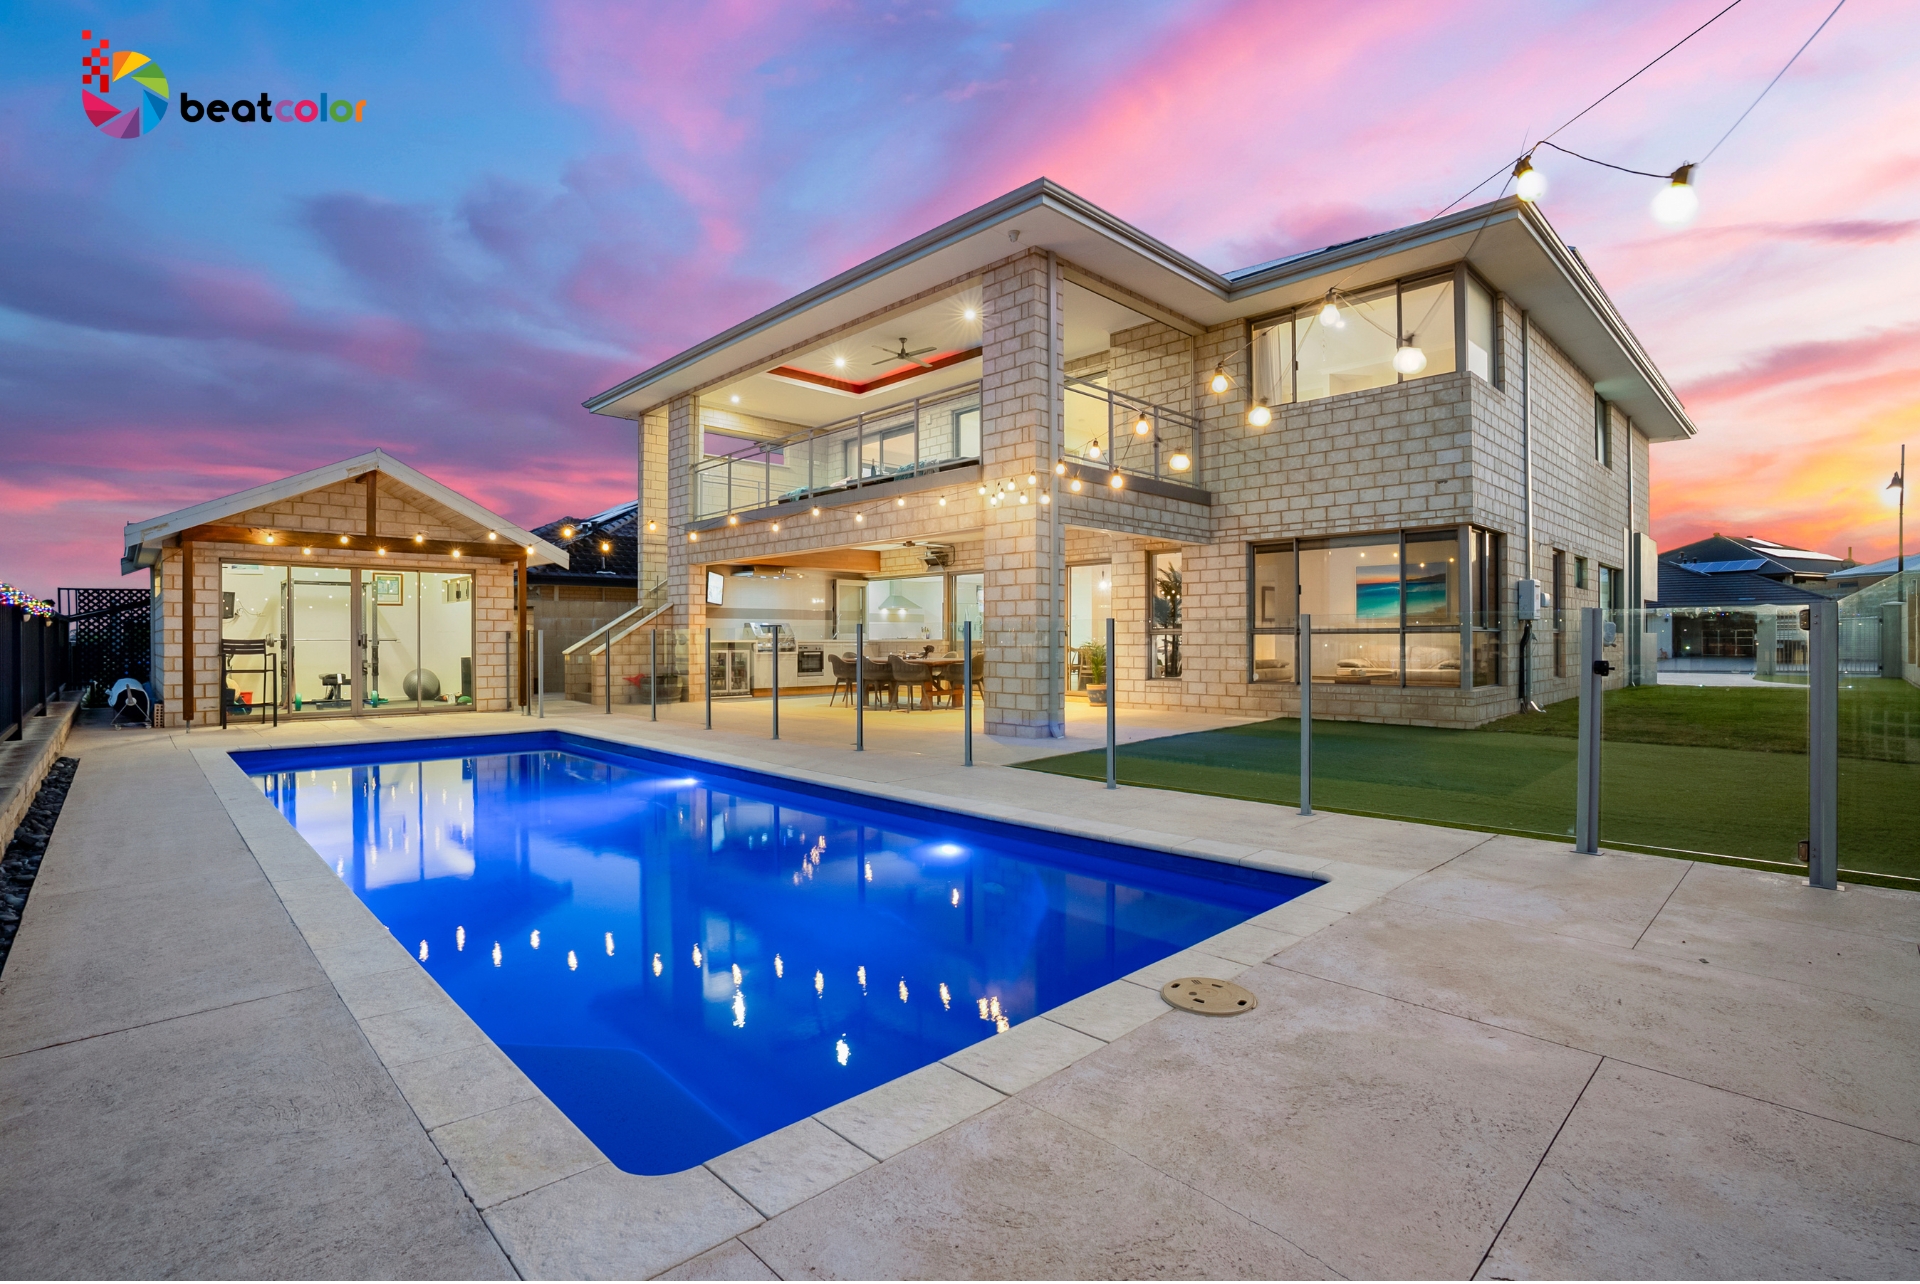
9. Replace Skies to Improve Exterior Appeal
a. Choose Natural Skies
Curb appeal is crucial in attracting potential buyers, and a well-chosen sky can make a property feel more inviting. Cloudy or washed-out skies often make homes appear dull, so replacing them with soft, realistic clouds or clear blue skies can elevate the overall image. When editing, ensure that the new sky feels natural and matches the lighting of the scene.
b. Align Lighting and Shadows
Although replacing skies can enhance visuals, it is important to maintain realistic lighting. Shadows and highlights on the property must correspond to the brightness and position of the new sky. Correct alignment ensures the photo remains credible, avoiding an artificial appearance that could mislead viewers.
10. Export and Organize Your Final Images Professionally
a. Consistent Export Settings
After completing edits, maintaining a standardized export process ensures all images appear cohesive. Set a uniform resolution, color profile, and file format to produce professional-looking photos. This approach avoids issues like inconsistent brightness or color differences between images in the same listing.

b. File Organization and Workflow
Organizing your files is just as important as editing itself. Naming images clearly according to rooms or angles helps both you and clients navigate the project easily. Additionally, creating separate folders for each property and saving presets for frequently used edits can significantly improve efficiency, allowing you to handle larger projects without confusion.
III. Recommended Software for Property Image Enhancement
Choosing the right editing software is an important step for beginners who want to build a smooth and efficient real estate photo editing workflow. As technology continues to advance in 2025, several platforms stand out for their stability, powerful tools, and user-friendly design.
Here are some of the most widely used and beginner-friendly tools in 2025:
- Adobe Lightroom: Best for exposure correction, white balance, and batch editing.
- Adobe Photoshop: Ideal for sky replacement, object removal, and advanced retouching.
- Luminar Neo: Offers strong AI-powered enhancements that automate complex edits.
- Capture One: Known for exceptional color grading and precise tonal control.
- Canva: Perfect for quick edits and creating social media or listing graphics.
As a beginner, start with the software that feels easiest to learn, then gradually explore more advanced platforms as your skills grow. Consistency with one tool will help you build a strong foundation and speed up your editing workflow.
Final Thoughts
Real estate photo editing is an essential component of modern property marketing. Although beginners may feel overwhelmed at first, practicing the fundamentals, such as exposure adjustments, color correction, HDR blending, distortion fixes, and workflow organization, quickly leads to professional-quality results. By mastering these techniques and using reliable software, you will create polished, compelling property images that stand out in a competitive market.
Read more:
Best Real Estate Photography Tips, Tools, and Services
Real Estate Photography: The Key to Faster Sales in 2025
Exterior Photo Editing: The New Standard for Real Estate Success in 2025


