Top Tips to Fix Common Mistakes in Interior Real Estate Photo Editing

The first impression plays an important role in selling or renting a property. High-quality, polished images can help real estate listings stand out. That’s why interior real estate photo editing plays a vital role in the property marketing process. However, even skilled editors can sometimes make mistakes that reduce the appeal of an image.
In this blog, we’ll explore common mistakes in interior real estate photo editing and provide practical tips to fix them. Whether you’re a professional photo editor or a real estate photographer, these tips will help you deliver better results.
I. Why Interior Real Estate Photo Editing Matters
Before diving into the mistakes, let’s quickly discuss why interior real estate photo editing is important. Edited images help:
- Highlight the best features of a property
- Create a clean, inviting atmosphere
- Correct lighting and color issues
- Remove distracting objects
- Increase click rates and attract potential buyers
Now, let’s move on to the most common mistakes and how to fix them.
II. Common Interior Real Estate Photo Editing Mistakes & How to Fix Them
1. Overexposure or Underexposure
Problem:
Many edited real estate photos either look too bright or too dark, losing important details in the process.
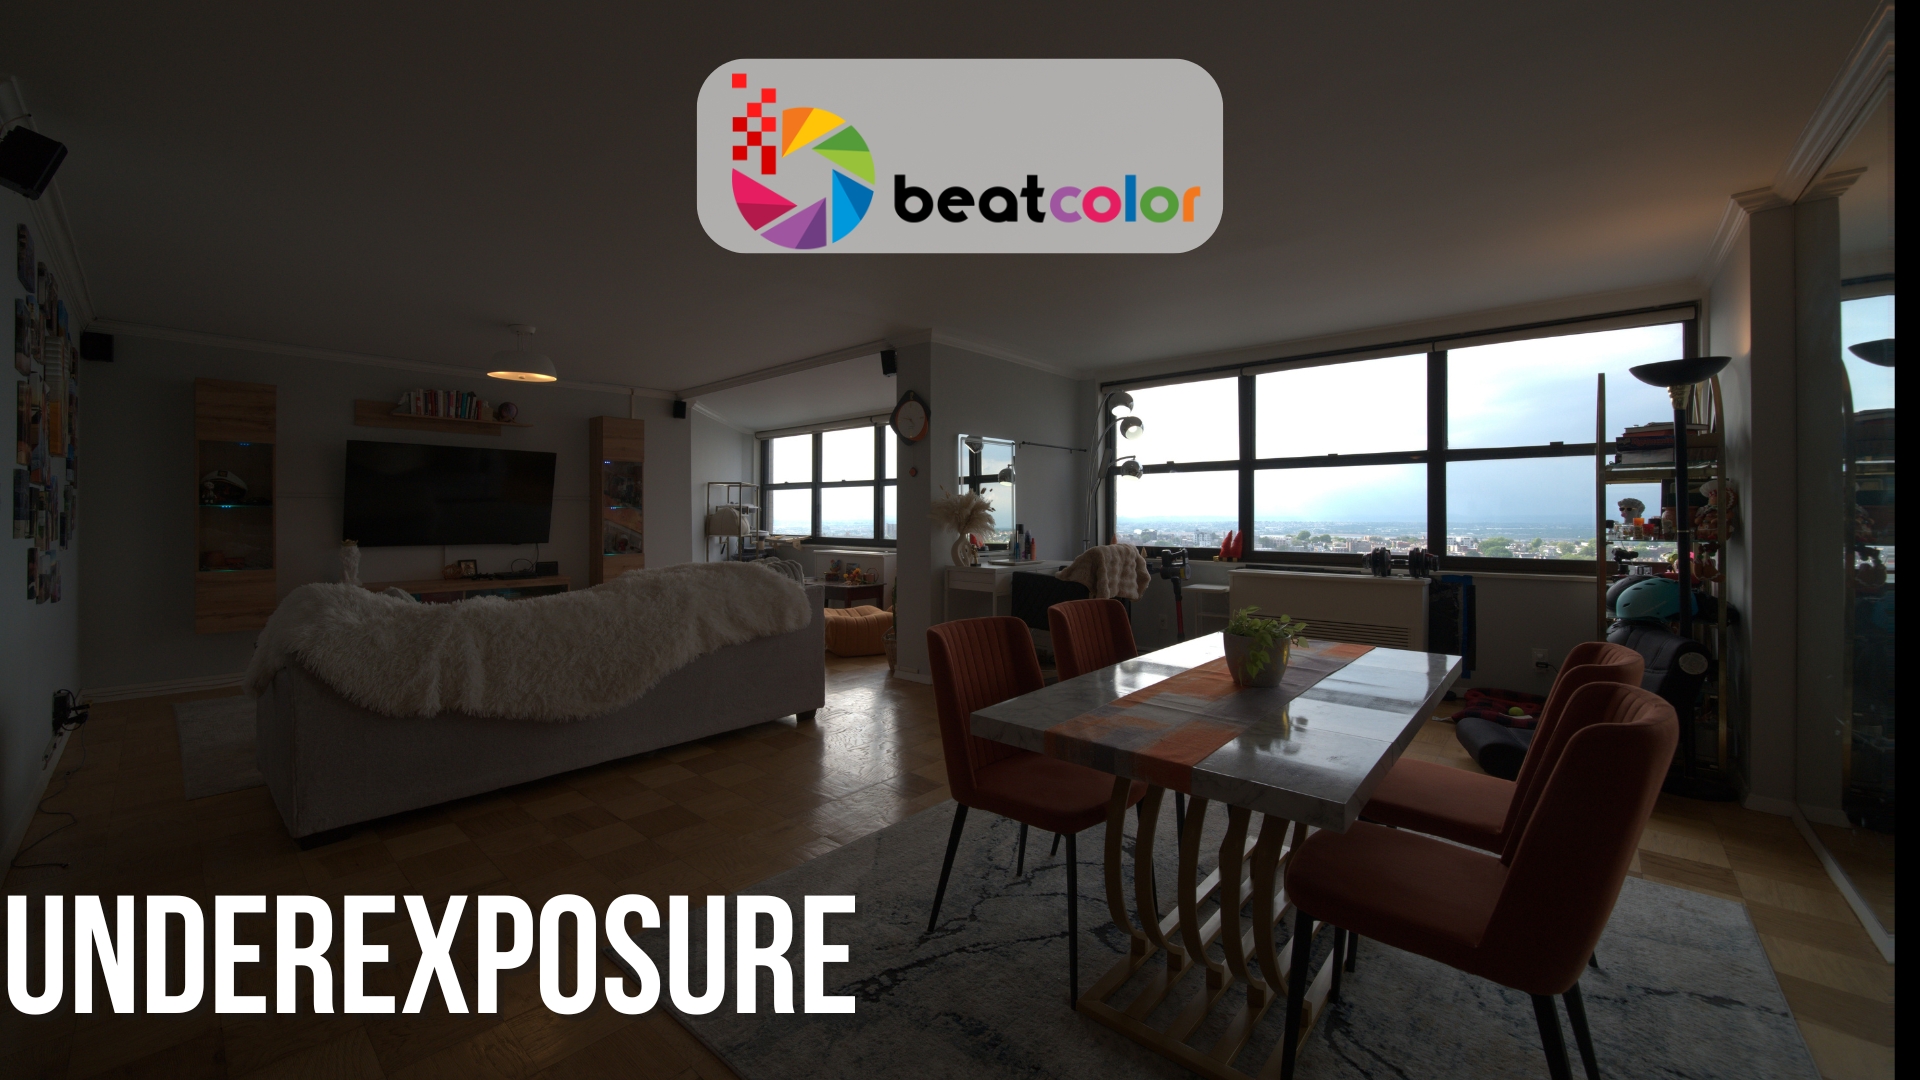

How to Fix:
Adjust exposure levels carefully to maintain a natural balance. Use tools like the histogram in Lightroom or Photoshop to monitor brightness and shadows. Always aim for a balanced light distribution across the entire image.
Pro Tip:
Blend multiple exposure brackets (HDR editing) to achieve balanced lighting without losing details.
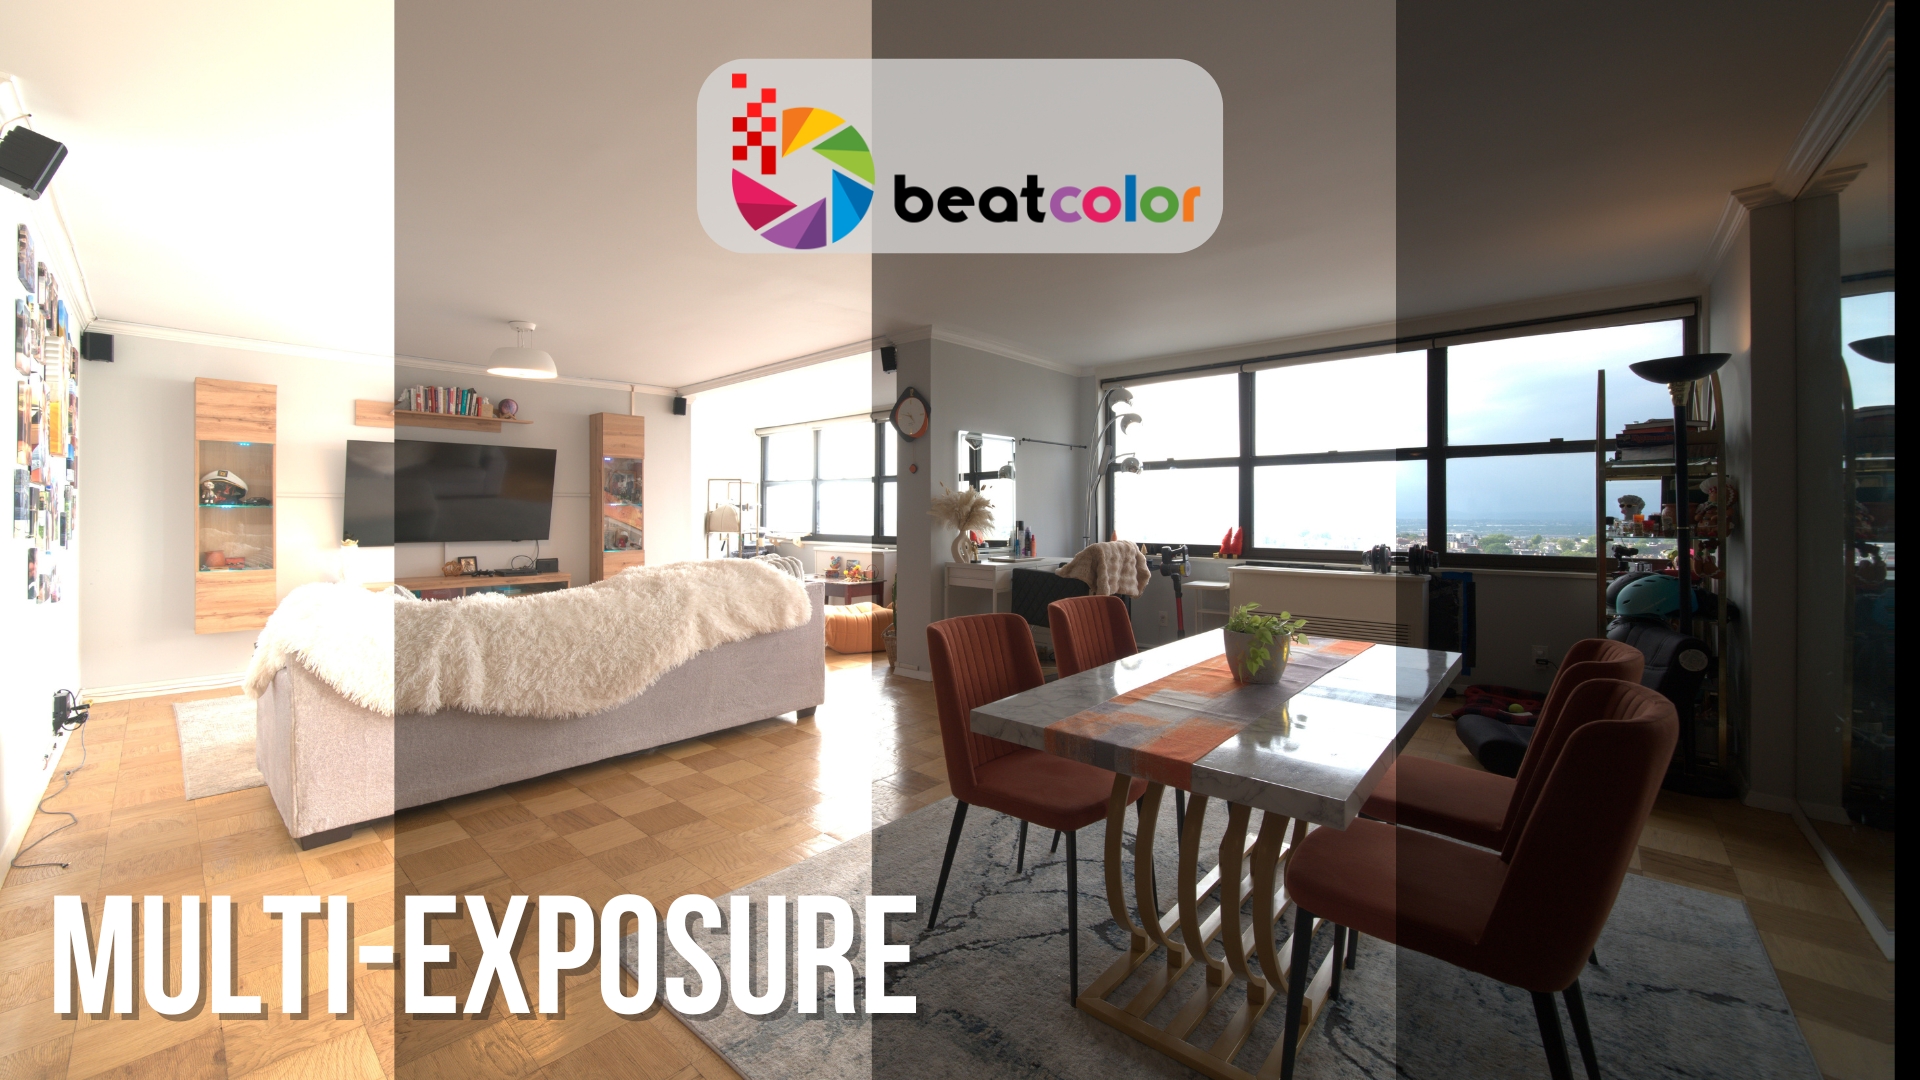
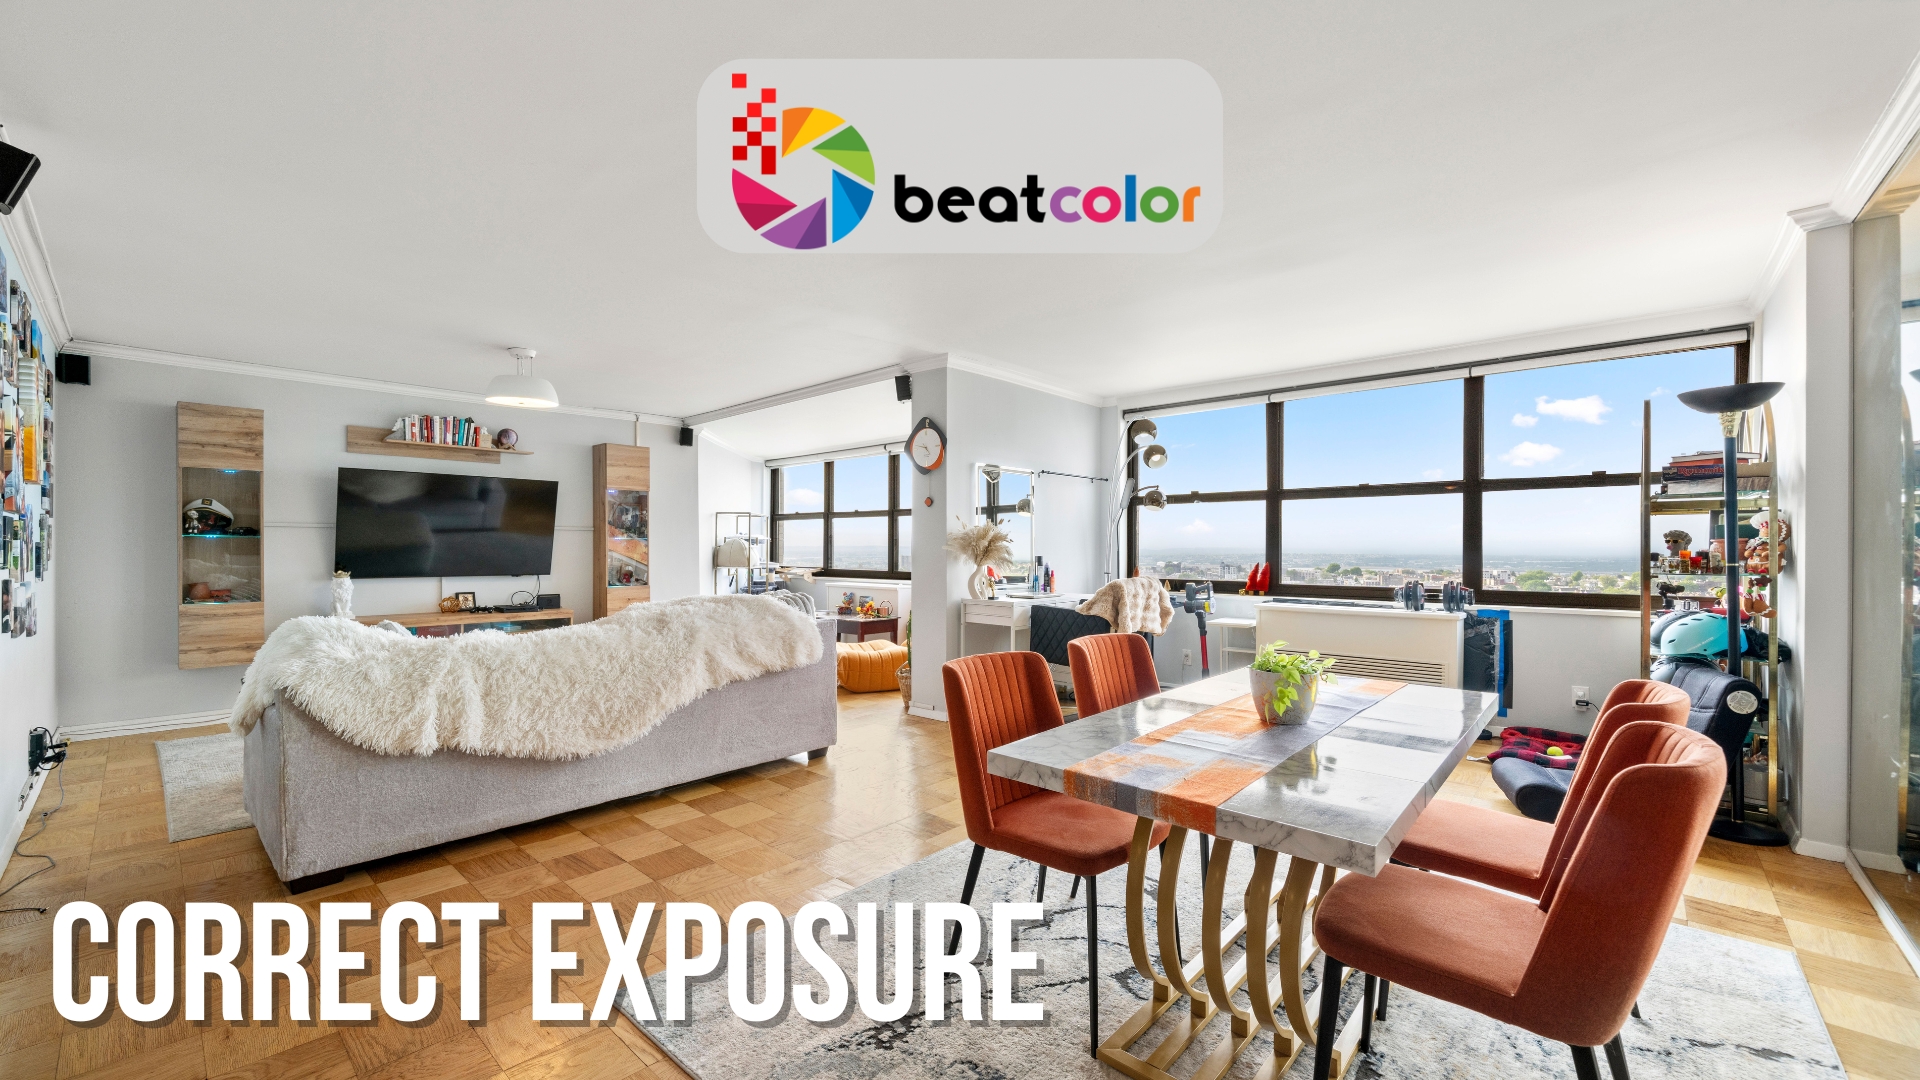
Read more: Underexposure vs Overexposure – A Beginner’s Guide
2. Excessive Use of Filters
Problem:
Over-editing with too many filters makes photos look artificial, which can reduce trust among potential buyers.
How to Fix:
Less is more when it comes to interior real estate photo editing. Use subtle adjustments for brightness, contrast, and clarity. Avoid over-saturating colors or using heavy vignettes.
Pro Tip:
Review edited images side-by-side with the original to ensure natural results
3. Inconsistent White Balance
Problem:
Different lighting sources in a room can cause color inconsistencies. Some areas might look too warm, while others appear cold.


How to Fix:
Use the white balance adjustment tool to maintain consistency. Choose a neutral point in the photo (like a white wall) and correct the tone accordingly.

Pro Tip:
Batch-edit images from the same shoot to maintain a consistent color tone across all interior images.
Watch more for: Fix White Balance Problems for DSLR & Mirrorless Photography
4. Incorrect Color Correction
Problem:
Colors that look unnatural or inconsistent across different images of the same property can confuse buyers.
How to Fix:
Adjust color temperature and tint settings to produce realistic tones. Avoid overly saturated colors for walls, floors, or furniture.
Pro Tip:
Use reference images or color charts during editing for consistency.
5. Ignoring Vertical and Horizontal Alignment
Problem:
Slanted lines and tilted walls are one of the biggest turn-offs in real estate photography.

How to Fix:
Use the lens correction and straightening tools in your editing software. Pay attention to the vertical lines of walls, windows, and furniture to ensure everything looks aligned.

Pro Tip:
Use the grid overlay while editing to spot and fix alignment issues easily.
6. Ignoring Shadow and Highlight Details
Problem:
Over-editing often leads to lost details in shadowy areas or blown-out highlights.
How to Fix:
Use the Shadows and Highlights sliders to recover lost details. Focus on making dark areas visible without flattening the image and control bright spots without dulling the photo.
Pro Tip:
Use layer masks in Photoshop for localized adjustments without affecting the whole image.
7. Leaving Distracting Elements in the Frame
Problem:
Objects like wires, cleaning tools, or personal items can ruin a polished image.


How to Fix:
Use the clone stamp or healing brush tools to remove distractions. Virtual staging can also be a great solution for replacing or removing unwanted elements.


Pro Tip:
Always check the corners and backgrounds of the image for any overlooked clutter.


III. Bonus Tips for Better Interior Real Estate Photo Editing
Aside from fixing mistakes, here are extra tips to make your interior real estate photo editing stand out:
- Use HDR Techniques: Combine multiple exposures for rooms with tricky lighting.
- Add Window Views: Use masking to blend indoor and outdoor exposures for window areas.
- Maintain Natural Shadows: Avoid removing shadows entirely, as they add depth and realism.
- Consider Virtual Staging: If a room is empty, virtual staging can help showcase its potential.
- Save Presets and Profiles: Create your own editing presets for faster, consistent results.
Final Thoughts
High-quality images are essential for successful property listings, and effective interior real estate photo editing ensures each room looks its best. By avoiding common mistakes and applying the tips above, you can create attractive, professional images that impress potential buyers.
Whether you’re editing your own photos or managing a professional editing service, paying attention to these details makes a huge difference in real estate marketing success.
Read more:
Flambient Real Estate Photography: Investment Cost and Service Value
The Best Photo Editing Programs You Should Try in 2025
Real Estate Photographer: A Modern Guide for 2025


