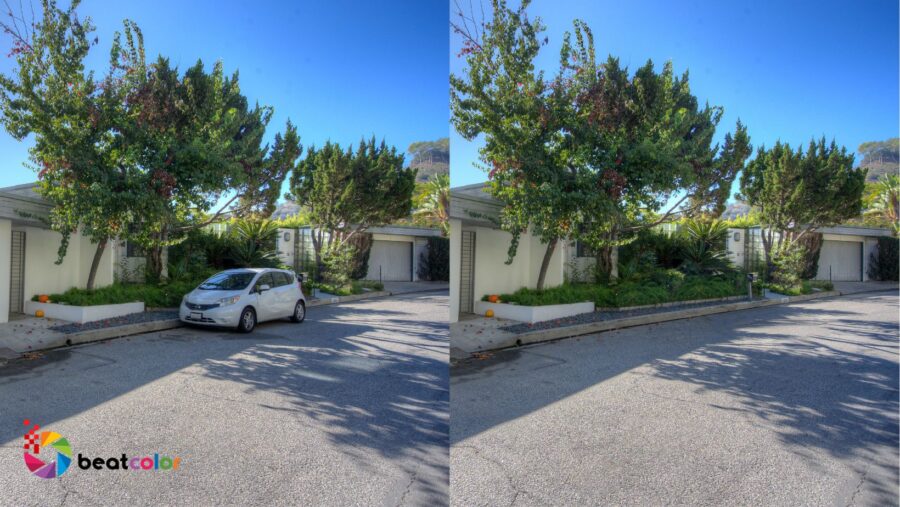
A Complete Guide For Photoshop Object Removal
Why do we need to use photoshop object removal ?
Sign posts, garden hoses, pool equipment or camera man, etc. , are unwanted objects which do not have a place in a real estate image used for real estate marketing. Fortunately, these undesirable items can be edited out by using some easy Photoshop tools and techniques. Let’s discover and get to know more about different ways to implement photoshop object removal effectively.
How to remove unwanted objects in Photoshop?
Tool 1: Content-Aware Fill
One of the best and easiest ways of removing anything from shots in Photoshop is by using the Content–Aware Fill. It allows us to fill in selections with content instead of simply a color.
1. Select File -> Open or use Ctrl + O to open the image you want to photoshop
2. Choose Lasso Tool and trace freehand around the object you want to get rid of.
3. Hit Edit -> Fill or use Shift + F5
4. Select Content Aware and click OK to finish photoshop object removal.
Photoshop will analyze and automatically figure out what should be filled in the gaps of the image. Content-aware is also a helpful tool when we need extend an image and add bleed.
Tool 2: Spot Healing Brush Tool
When you’ve got smaller elements and blemishes to remove, it’s time to bust out the Spot Healing Brush Tool. Simply paint over the item you want to strip, and Photoshop will sample the colors around it and do the hard work for you. Complicated in theory, but super simple to practice.
1. Determine the object which should be removed and zoom in.
2. Choose Spot Healing Brush Tool -> Content Aware Type
3. Brush over the object. Photoshop will automatically patch pixels over the selected area.
Tool 3: Patch Tool
Besides Content-aware fill, Spot Healing Brush tool, Patch tool is another great tool assisting us remove any undesired items from shots. Patch tool is able to create a selection and then drag it over a spot which would better suit the element you want to banish.
1. Select the Patch Tool
2. Draw a line around the object you want to remove. Drag the selection to an area that you want to use as a patch sample.
Tool 4: Clone Stamp Tool
The Clone Stamp Tool is an invaluable function for retouchers the world over. It’s a touch trickier to use, but once you master it a whole world of photo manipulation is at your fingertips. The principle is simple: (ALT)+click on an area you would like to copy and then paint over the areas to hide. Every now and then you will need to resample the source area to keep things natural looking.
1. Start with a new clayer
2. Select the Clone Stamp Tool
3. Move to the area where the unwanted object is found.
4. Hold Alt until the cursor turns into a crosshair. Click on the area you want to sample.
5. Brush on the object you want to remove. This will copy the pixels of the sample area you selected in step 3. A small plus sign shows the sample area that the brush is copying over the object you want to remove.
Tool 5: Other Tool s Assisting Photoshop Object Removal
Brush Tool
One of the most simplest and quickest method to remove anything from your picture is to paint straight over it. Select Brush Tool, sample the background color next to it using the eyedropper tool , and plaster over it. Regrettably, this tool only works well if it is a flat coloured background.
Crop Tool
For those who are newbies in Photoshop, Crop Tool is one option you can consider. We use the Crop Tool to remove unwanted objects from a picture’s sides, just by basically cutting them out.
In conclusion
We hope the concise post gives you helpful methods of how to remove unwanted objects by using Photoshop. Object removal in several photos is easy to handle while others require more work. If needed, people will use a combination of these tools mentioned above to achieve the best results.

Related Posts:
How To Declutter Stuffs By Photoshop
A Straightforward Guide To Remove Shadows From Photos


