How Important Of Verticals In Real Estate Photography?
In an industry where pictures are the main selling point like real estate, photos need to be perfect and spotless. And one of the most noticeable issues when looking at a real estate photo is verticals which can make the photos look weird and unprofessional if they are not fixed correctly.
What Is Verticals In Real Estate Photography?
Verticals in real estate will happen when photographers shoot things with straight edges, especially buildings. When photographers shoot things higher than them, they have to tilt the camera back to get all the details they want. As a result, the vertical lines in real life seem to converge toward the top of the frame making it strange.
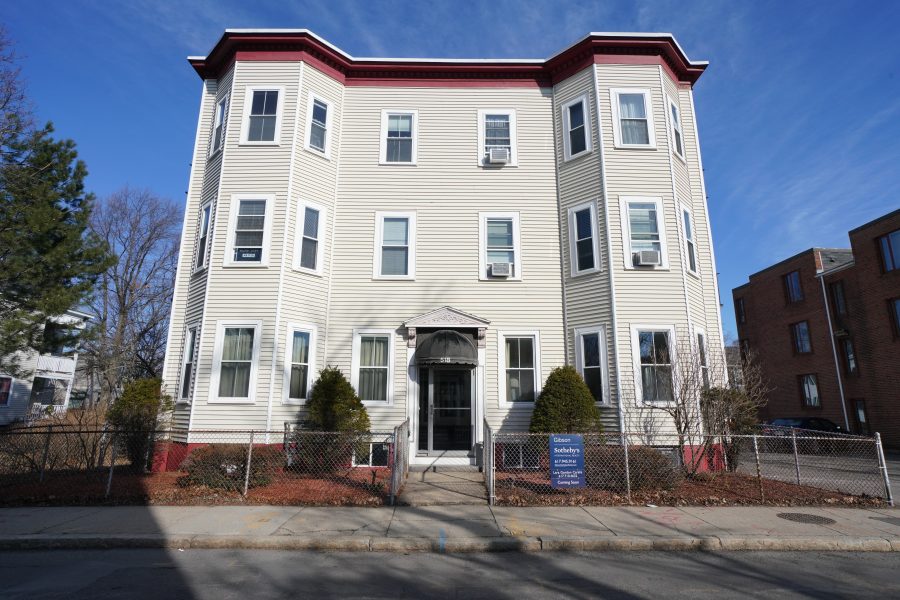
To understand about the verticals, let take a look at the following photos
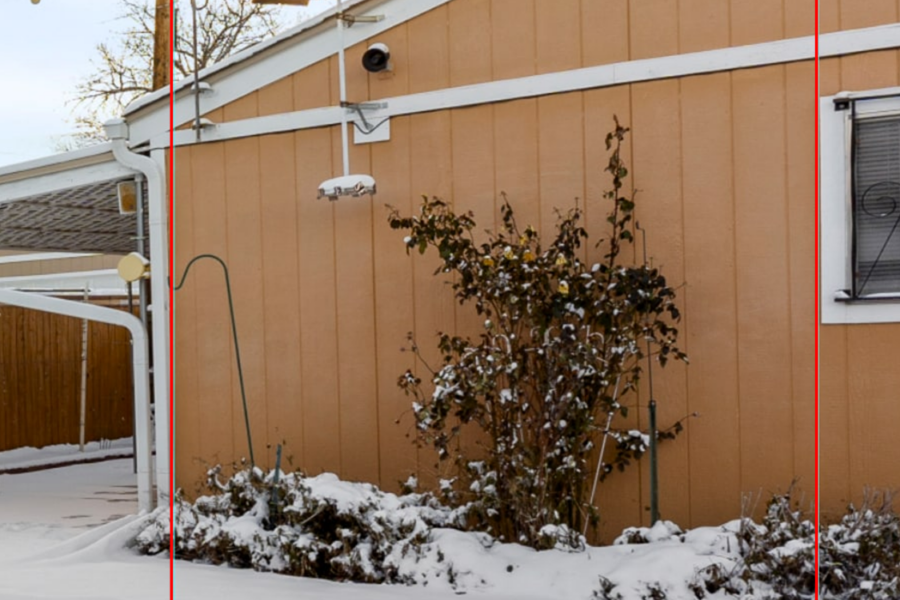
This photo is the original photo without any vertical adjustment. As you can see, the vertical lines in real life are not the same in the image, which makes the photo look distorted and unprofessional.
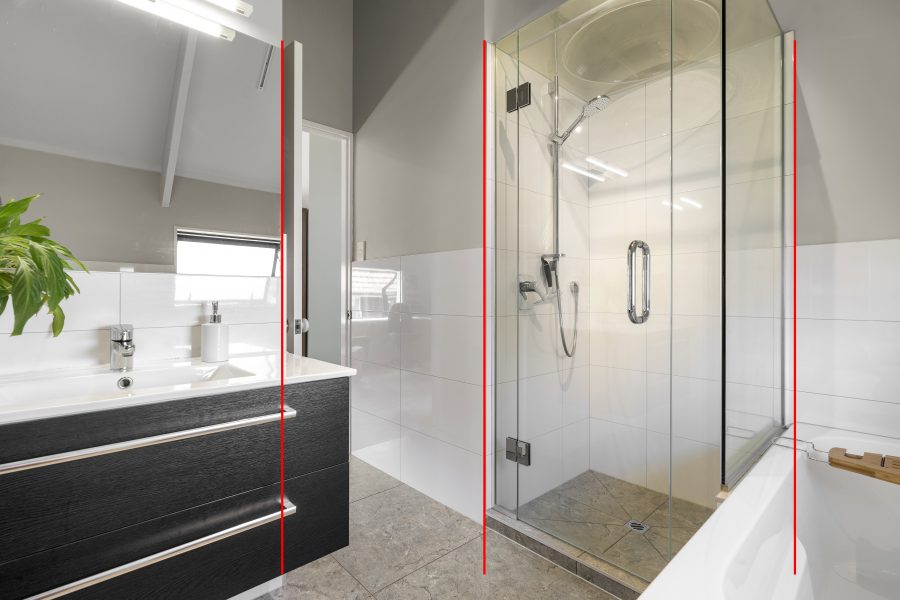
Here is the photo which has been fixed verticals. Some details around the edges can be cropped but the photos look more realistic and appealing.
Tips to Get The Verticals Right In Real Estate Photography
As mentioned above, the photos can be distorted or look strange when the verticals are not right. To minimize this issue, here are some tips to get the verticals right in real estate photography
#1. Keep the camera level
Keep your camera level and in the right direction is the best way to fix the verticals on your camera. Using a tripod to support keeping the camera still, then turn on grids on screen mode in the setting of your camera. Now your camera screen will appear with vertical and horizontal lines which are the points for you to check whether the vertical and horizontal lines (windows, walls, or photo frames) in the photo are correct or not. If they are not parallel, you need to fix the direction of the camera to make sure they are parallel together.
#2. Using the right lens
Picking the right lens when shooting can also reduce lens distortion and help to keep verticals vertical a lot. 24-77mm lens and 16-35 mm lens are the good choices. Both of the two can minimize lens distortion when shooting real estate photos. 24-77mm lens is suitable to shoot interior shots while a 16-35 mm lens is ideal for open space because it can capture wider angles.
#3. Choose right angles and composition
A real estate photo which can contain more space is mainly what the photographer expects for. Therefore, choosing a right angle can not only help them show more space and marketable features in the room, but also help to keep vertical lines parallel to each other.
When composing the photo, it is suggested to base on the edge of a painting or a wall or appliance, lines from flooring, baseboards, cabinets, furniture, etc… to adjust the verticals of the photos.
#4. Fix in Photoshop
Sometimes, the photos still are not vertical although you follow all the listed tips above. The final method to correct the verticals is fixing them in Photoshop. Open your photos in Adobe Photoshop, then turn the Ruler Grid function on. There will be vertical and horizontal lines appearing on the photos. You can base them to adjust the verticals of your photos. The tip when doing it is you should adjust the main middle line first, then move to fix the side lines.
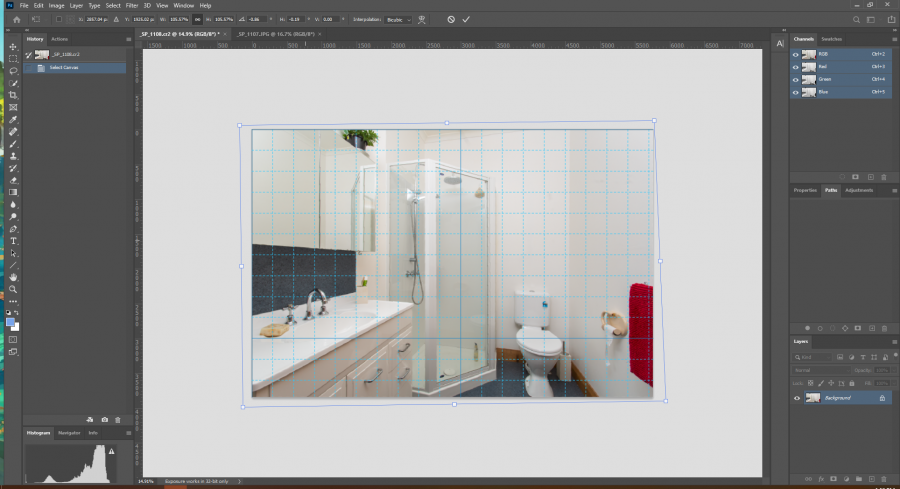
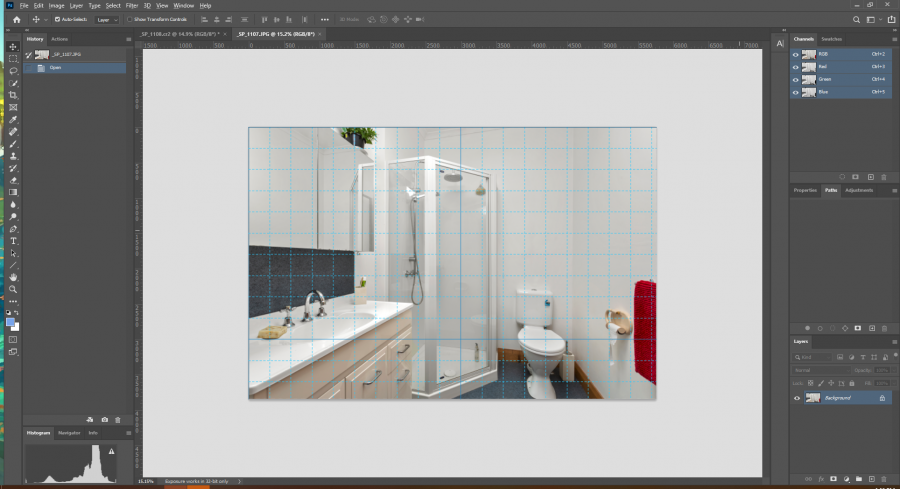
There is a fact that there are many photos which are hard to define the verticals to fix and take more time to do it manually. If you are in that case, outsourcing real estate photo editing service is your savior. They are trained to make the real estate photos outstanding, therefore, they can deal with all the hardest cases. Vertical straightening is just a simple task with them.
Final Thoughts
Straightening verticals in photos is very crucial to make the photos look more realistic. Thus, do not let your photos appear with skewed verticals, because it can ruin all your effort to have a hero photo to sell home. Make sure you apply all vertical correction techniques to have great photos!


