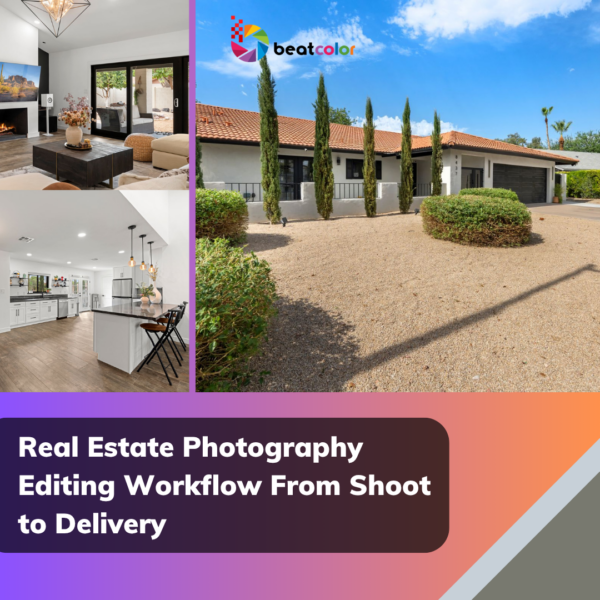
HDR Real Estate Photo Editing – What You Know?

HDR Real Estate Photo Editing is a specialized technique used to enhance property photographs. This method aims to showcase properties in their best light, highlighting details in both shadows and highlights. For any real estate professionals looking to attract potential buyers or renters by presenting properties in the most captivating way possible, do not miss it.
Today, let’s delve into further details!
What is HDR? When We Need HDR Real Estate Photo Editing?
Every photo taken has a dynamic range value, usually translated as “dynamic contrast range.” Simply, it is a set with the lowest brightness value at one exposure and the highest brightness value at the other exposures, where the captured image does not lose detail. Thus, the wider the dynamic range of a photo, the more details it contains from dark to light.
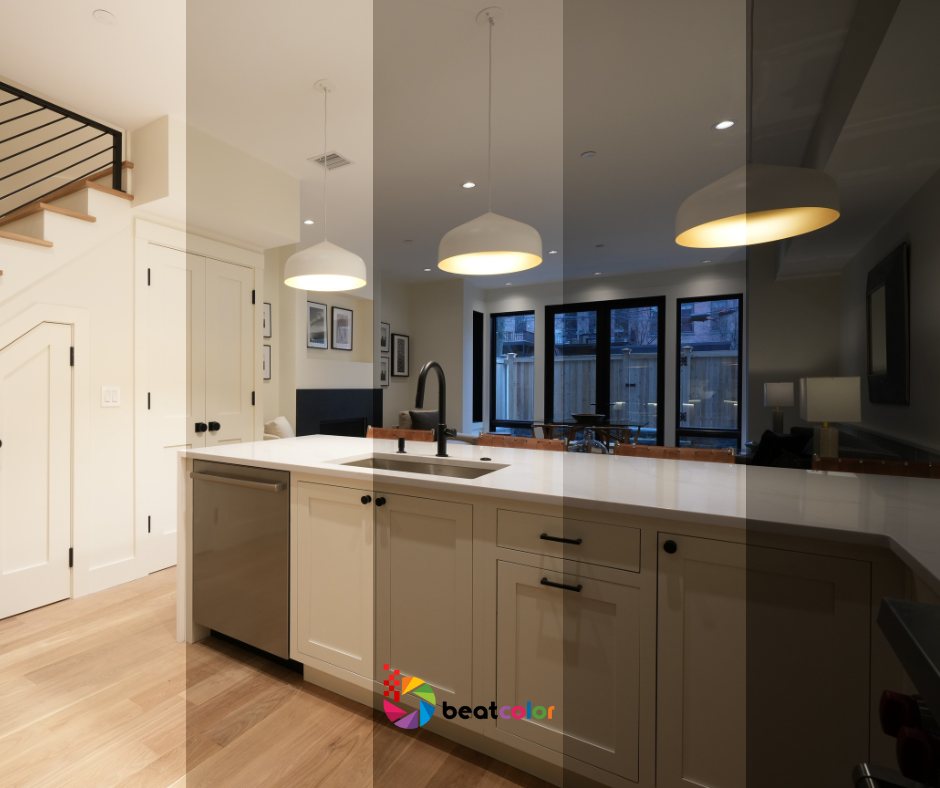
When taking a photo in high contrast conditions (for example, shooting a tall building against the light in the middle of the day), you will often fall into one of two cases. Either the building appears detailed in the photo but the sky is “washed out,” with no clouds visible; or the sky is clear with clouds, but the building below is “pitch black,” and it’s hard to distinguish balconies from windows.
The reason is that the dynamic range of the photo is not wide enough to cover the entire dynamic range of the scene you want to capture. This is something that cannot be overcome because the sensor of the camera you’re using can only extend the dynamic range of the photo to a certain extent. And this is where HDR comes in handy.

HDR – High Dynamic Range – is understood as a technique to expand the dynamic contrast range of a photo beyond the camera’s limit, allowing us to retain all the details in the desired photo.
Thus, HDR is useful when you have to take photos in bright conditions with a large contrast range, to preserve all the details in the photo, achieved by manually combining three identical photos taken at three different dynamic range values into one.
Returning to the example above, to overcome the situation of either overexposure or underexposure, the photographer will create an HDR real estate photo by taking three photos as follows:
>> Related post: The Top Real Estate HDR Photo Editing Services
Step 1:
1 photo taken at correct exposure (EV = 0). It’s important to note that “correct exposure” here is a relative concept, understood as the value assigned EV = 0 where the camera tries to calculate to capture what the human eye sees the most.
Step 2:
1 intentionally underexposed photo (EV < 0). With this photo, of course, the sky looks completely “washed out.” But because we have “shifted” the dynamic range of the photo to a negative value, it will cover the dark area of the building shadow and retain details like windows or balconies of this building.
Step 3:
1 intentionally overexposed photo (EV > 0). With this photo, of course, the building will be completely “pitch black.” But because we have “shifted” the dynamic range of the photo to a positive value, it will cover the bright area of the sky and retain details like clouds in the sky.
These three photos must be identical, from the shooting position, and shooting angle to the focus point, depth of field, etc. Therefore, the ideal way to take HDR photos is to set the camera on a tripod and switch the focus mode to manual.
Once you have the ingredients, the photographer will use HDR real estate photo editing software on the computer to process them.
How to Shoot HDR Real Estate Photography
Before discussing a completed guide for HDR real estate photo editing, let’s learn how a specific shooting process is as follows:
Step 1: Set up
Set up the camera on a tripod, choose the angle you want, perform light metering (with EV = 0), focus, and set parameters as usual. Switch the camera to Av mode to keep the lens aperture constant. Switch to manual focus to keep the focus point constant. Press the shutter button to capture – You get photo 1.
Step 2: Camera Setting
Keep the camera in the same position as in step 1, set EV < 0. At this point, the camera will automatically increase the shutter speed to darken the photo. Press the shutter button – You get photo 2.
You can repeat this step with different EV values (-1, -2, etc.) combined with reviewing the photos continuously after each shot until you see that all the details on the building have been fully preserved. Don’t worry about the sky because the third photo will solve that problem.
Step 3: Repeat the same as step 2
You can repeat many times with different EV values > 0 until you see that all the details in the sky have been fully preserved. You get photo 3. Note that these photos will be in RAW format.
Now, you have real estate images with various exposures already! Keep reading and learn more about how to edit HDR real estate photos.
A Completed Guide for HDR Real Estate Photo Editing 2024
BeatColor wants to introduce Photomatix Pro, a powerful software specialized in HDR real estate photo editing with many powerful effects. After installation, firstly, you need to start the program:
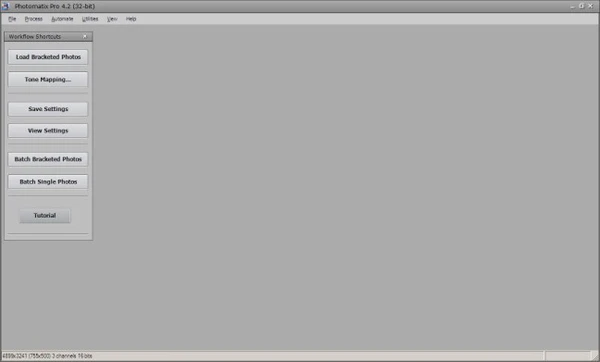
- Click on Load Bracketed Photos. The Loading Bracketed Photos window jumps out.
- Click Browse and select the 3 raw photos you already have. The Preprocessing Options window appears.
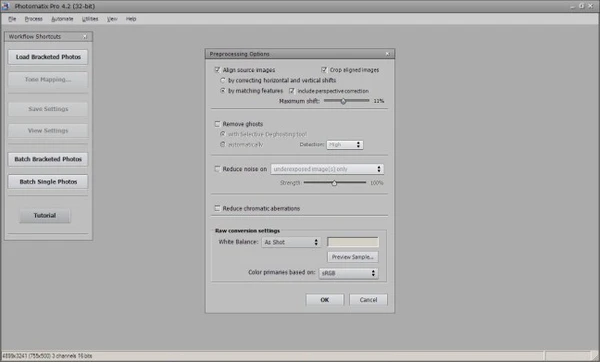
- Check the Remove Ghosts box if, at the time of shooting the 3 raw photos, you can create unwanted moving objects such as pedestrians, cars, motorcycles, etc., appearing in the frame.
- Check the Reduce noise on and Reduce chromatic aberrations boxes. Press OK.
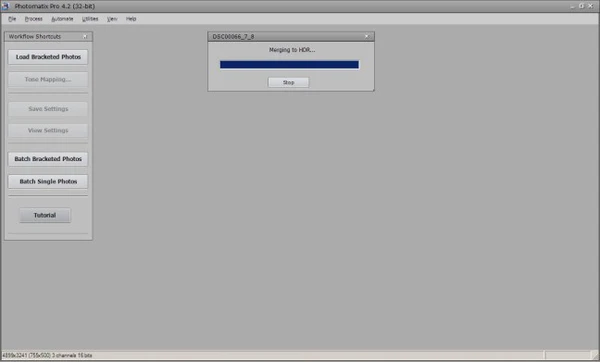
- The software starts the HDR real estate photo processing stage. After completing the preparation stage, the software allows us to preview the output results. You can change, add effects, or edit by clicking on the Tone Mapping / Fusion tool.
You can freely edit using the drag-and-drop tools on the left column or choose from the available effects in the Presets frame on the right. After making your selection, press Process on the bottom left to officially complete the HDR photos creation process.
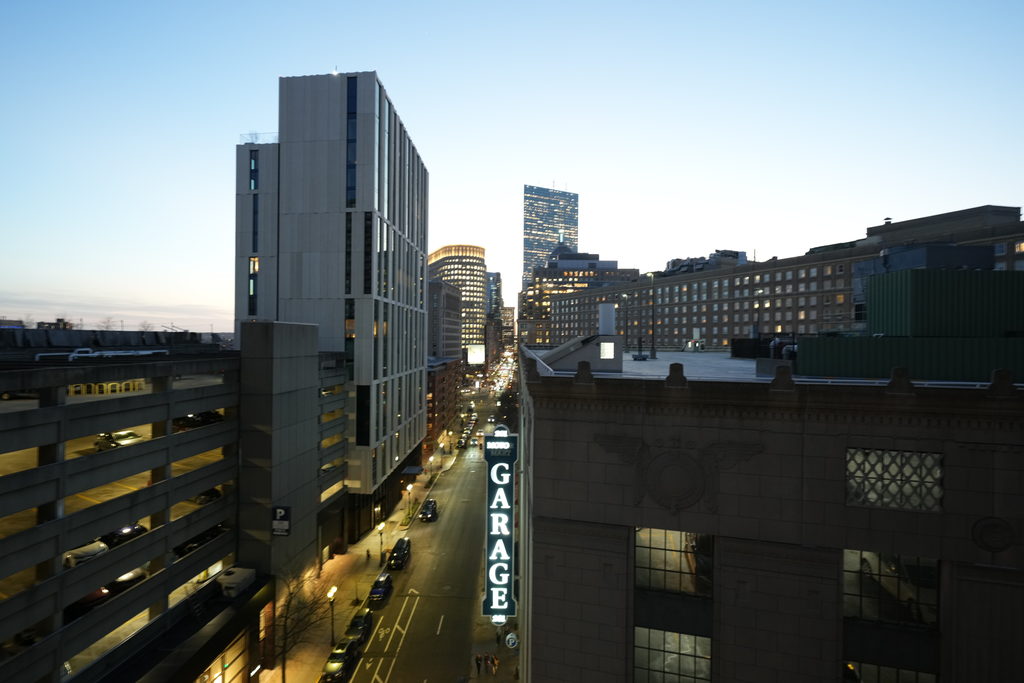
And this is the final result:

Final Thoughts
In conclusion, the essence of HDR real estate photo editing is different from blending colors in PhotoShop. The motto of true HDR photographers is: “A good HDR image is one that viewers don’t recognize as an HDR photo.” That’s why BeatColor determined our goal to provide high-quality and natural real estate image enhancement over the years.
If you are looking a trusted name for HDR Photo Editing Service, contact BeatColor now to get Free Trials!
FAQs for HDR Real Estate Photo Editing:
Why not use the built-in HDR feature on the camera?
On modern camera models today, the built-in HDR feature may be available. However, because it works entirely automatically, the resulting output can be good or bad. Yet more importantly, it may not always be what we want.
Can I use the Auto Bracketing feature?
Auto Bracketing (AEB) is a feature integrated into the majority of interchangeable lens cameras. By pre-setting the desired EV range, for example, +/-2, you press the shutter button once. Then, the camera will automatically save 3 photos with EV values of -2, 0, and 2 respectively.
This feature is very useful and consider using it if you don’t have a tripod or the shooting content doesn’t allow for repeated attempts. Because its weakness is that the EV values of the 3 photos received will be equally spaced. Whereas, if shot manually, these EV values can vary as desired, for example, the first raw photo has EV = 0, the second raw photo has EV = -2, but the last raw photo has EV = 3.
There are HDR photos on the internet that look very “fake”, how can I achieve that?
Photomatix Pro is a very powerful HDR real estate photo editing software. Explore and experiment with the tools in Tone Mapping / Fusion, you will get some amazing results. However, always remember the original purpose of HDR: it expands the dynamic range of the image beyond the limits of the camera, thus helping to preserve more details in the photo.


