Photoshop Color Correcting Techniques In Real Estate Photo Editing
Photoshop color correcting is something simple but most real estate editors still make mistakes occasionally. Photos which come straight from a digital camera are not always perfect. As you start to gain more experience with Photoshop, you may notice some recurring problems with photos that need to be fixed. For example, several photos may be too dark while others are too light. There are various Photoshop color correcting techniques that can make your images look dramatically better. In this concise article, we will cover the main contents as below:
Vibrance
Hue And Saturation
Color Balance and Photo Filter
Selective Color
Curves And Levels
Top Useful Photoshop Color Correcting Techniques For Image Enhancement
Photoshop opens a dialog box where you can edit the color correcting or adjustment settings. Let’s check and choose the best tool for you.
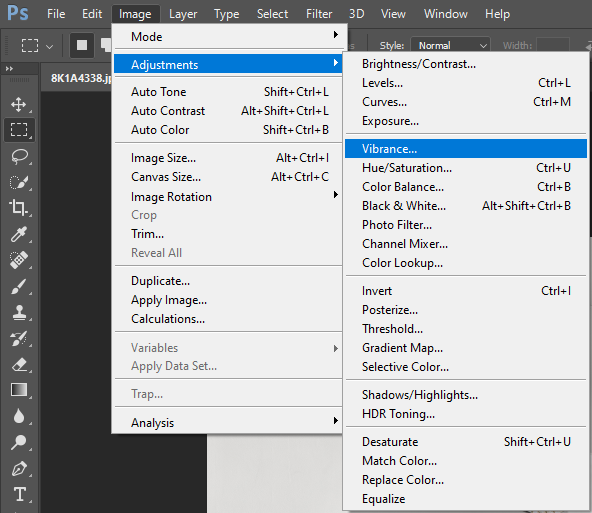
- Vibrance
It is obvious that Vibrance is a smart tool that boosts the intensity of more muted colors in a photo as well as leaves the already well-saturated colors separately. The Vibrance adjustment offers two sliders: Vibrance and Saturation. Photo editors mostly use it to go up or down the intensity of a photo’s color. The different point is that Saturation impacts all colors overall while Vibrance works on muted colors more than already saturated ones.
Choose Image > Adjustments > Vibrance to create a Vibrance / Saturation Adjustment layer.
- Properties panel shows you the Vibrance slider to decrease or increase color saturation without clipping in case of colors become more saturated. Next, depending on the original images, you can choose one of the following options:
- Drag the Vibrance slider to the right, which helps apply more adjustment to less saturated colors and prevents colors clipping as they reach total saturation.
- Move the Saturation slider to apply the same amount of saturation adjustment to all colors regardless of their current saturation.
- Pull either the Saturation or the Vibrance slider to the left to decrease saturation.
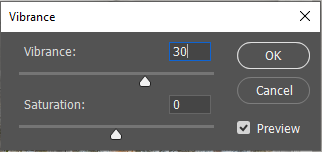
Drag the Vibrance/ Saturation slider up/ down to make dull colors more/ less vivid.
Hue And Saturation
Saturation could easily create an unnatural look for colors and skin tone. Although the Vibrance adjustment includes a saturation control, it is recommended to make changes to the image’s saturation with the Hue/Saturation adjustment instead of Vibrance adjustment.
Hue/Saturation allows you to adjust the Hue, Saturation, and Lightness of a specific range of colors in an image or simultaneously colorize your images. This adjustment is significant to augment color correction and is especially necessary for fine-tuning colors in a CMYK photo.

• Adjust the Hue level to your preference will change the colors of all the objects in the photo.
• On the other hand, Saturation can add or remove all the colors of an object. Just by clicking the Little Finger in the box and selecting any part from the photo, you can easily do Saturation jobs. By pulling to the left or right, the image will decrease or increase saturation.
• Lightness will affect the contrast of the image. It can make a photo very light or very dark by dragging the Lightness slider as you can see above.
• It is advised to use the range of colors at the bottom of the dialog box. It specifies the range and focus to be used.
• If you want to change color, you can click the Eyedropper to the chosen part and edit. To add colors, choose the Eyedropper with a plus (+) sign. In contrast, use the Eyedropper with a minus (-) sign to decrease colors.
- Color Balance and Photo Filter
In Photoshop, the Color Balance adjustment layer also can help correct color imperfections in the photo. It contains three color channels and their complementary colors which allow users to adjust the balance of these pairs to make a photo color more vivid. You can also use the color balance to create dramatic effects by changing the overall mixture of colors used in your composite. Photo Filter is another option that allows you to apply a hue adjustment to your image. Photo Filter adjustments mimic the technique of placing a colored filter in front of your camera lens to adjust the color balance and temperature of the light transmitted through the lens and exposing the film.

Both Photo Filter and Color Balance adjustment layers give users the ability to readjust the settings, creates a layer mask to affect a part of an image, and protects the original image from direct changes.
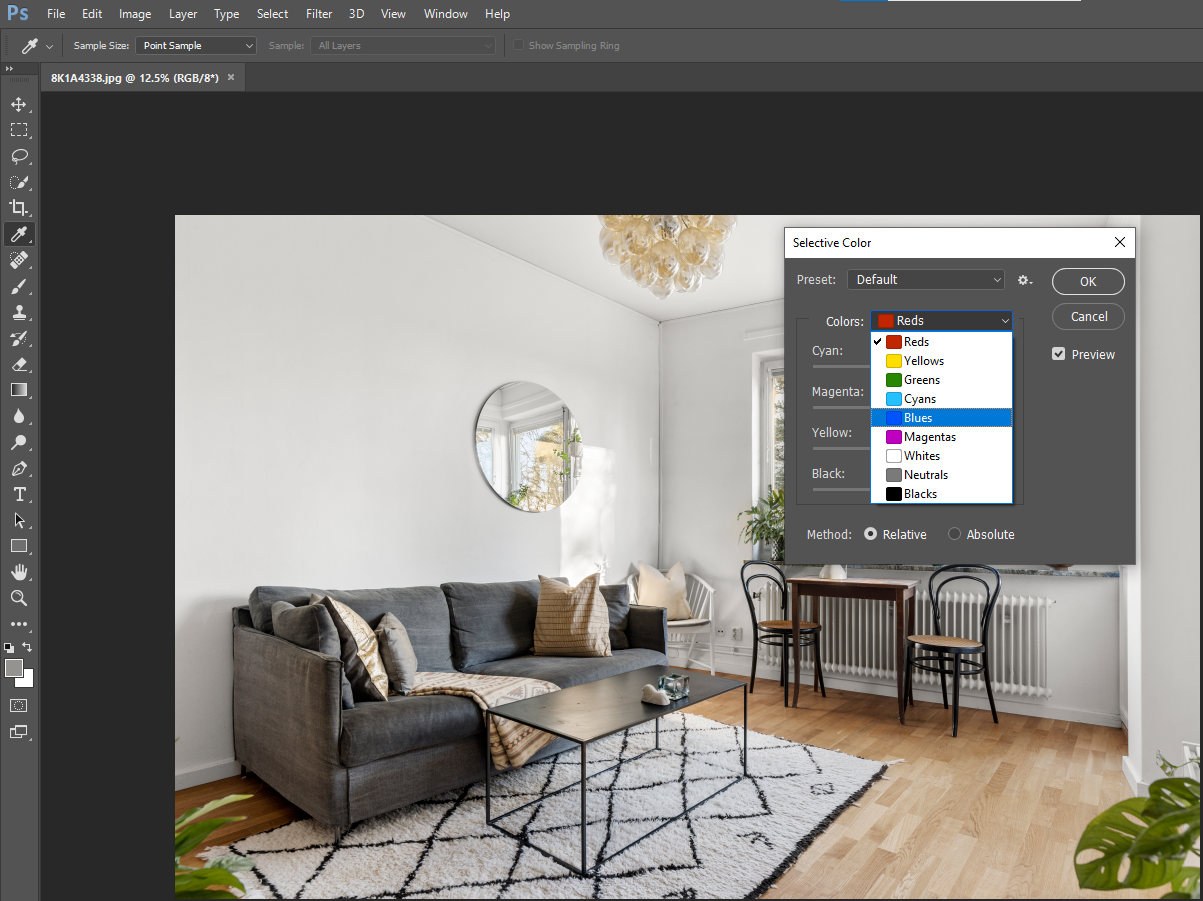
- Selective Color
The Selective Color Adjustment Layer tool provides various channels that allow us to flexibly change the CMYK values of an image. For instance, you can increase or reduce the intensity of Magentas in the Yellow areas of the image. You can use this tool to greatly alter the colors in that image.
Open the Adjustments window and choose Selective Color to create a Selective Color Adjustments Layer. Selective Color is used mostly for correcting color casts and for actual color grading with precise control.
Compared to any other method, Selective Color adjustment is preferred thanks to its ability to handle levels. As a result, people find it much more enjoyable to use for color grading. Hue and Saturation is a little too basic in this regard and hence, is better suited to the other tasks mentioned above. Clicking on the colors drop-down, then there will be six color options pop out, as well as the mid-tones (whites, blacks, and neutrals), highlight, and shadow. In each channel of the Selective color tool, we will be given the ability to fully control how much red, green, blue (plus their complementary colors) we add or take away.
- Threshold Adjustment and Curves
Choose Image and go to Adjustment. Then, choose Threshold and a curve dialog will open for you to start creating a neat one-color effect for you image. Moving the dialog box level will turn the image lighter, going to the right, darker in color.
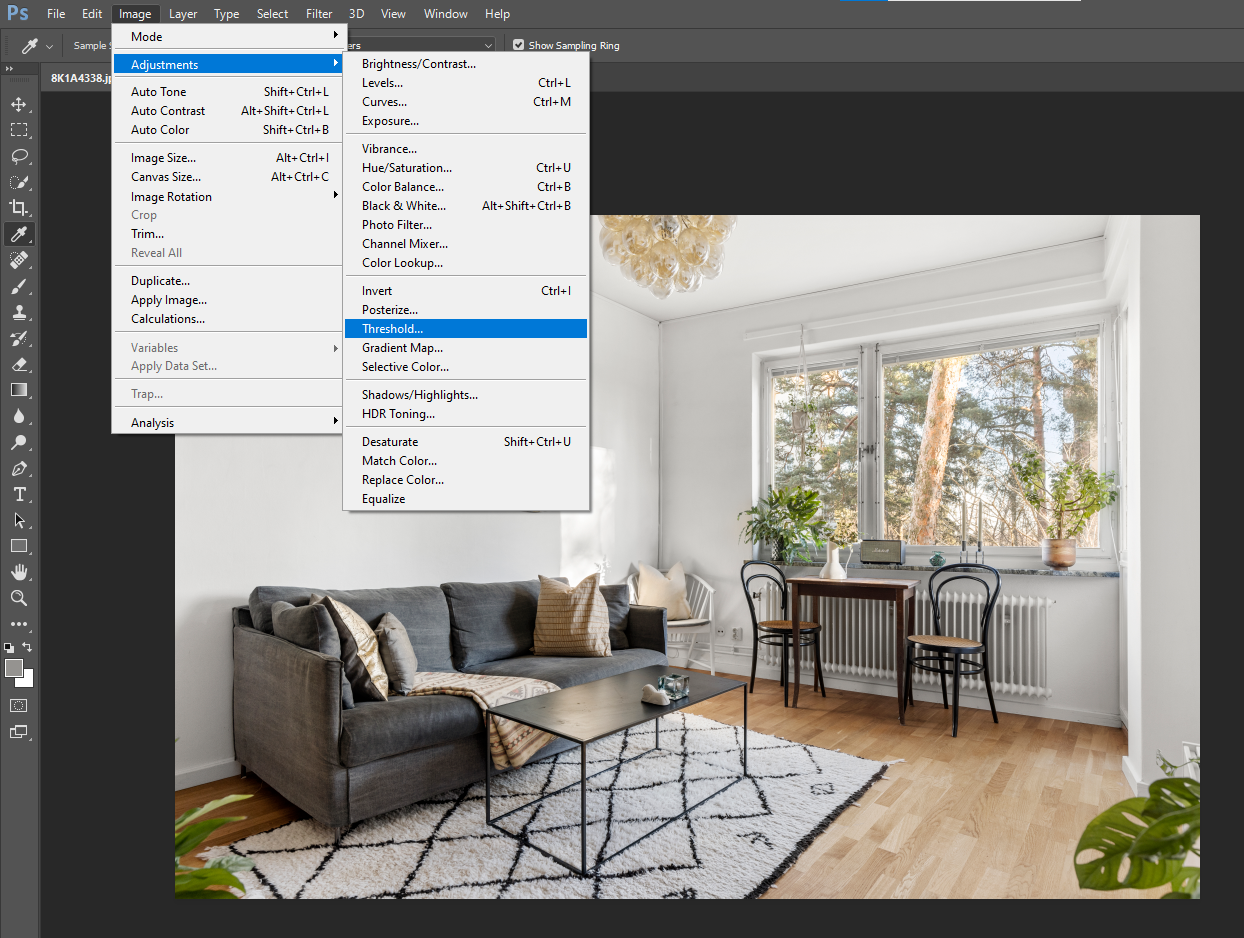
- Another option is choosing Layer -> New Adjustment Layer -> Threshold. Then the same dialog box will pop out. Or else, you can switch to the Burn tool, arrange to the Midtones and adjust the exposure to only 10% and pick the Eyedropper tool while holding down the Shift button at the same time.

- Adding to the image’s definition: you need to hold the Optional Outkey to either darken or adding exposure.
- Adjusting the white balance: you can pick any white object then apply color grading. Make sure you are on Curves if you want to do this.
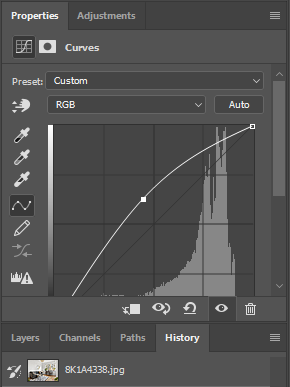
- Open a 4-point curve by clicking the area of concerned. This time, make sure all color points are on the same horizontal line. To do this, click the color buttons and drag each color either up or down to position it to the same horizontal line.
Conclusion
It is a truth that the color of an image has a significant impact on the potential buyers’ attention. Thus, Photoshop color correcting, which is perfect for when you want to get heavily into a photo and get its color as best as possible, helps to give natural color to a dull photo. If you are looking for an advanced color correction service, please contact us without hesitation. We provide the best color grading service for photography Post-production and editing.
Related post:
Real Estate Photography Lighting | BeatColor
Preparing for a Real Estate Photo Shoot


