Tips for Shooting Real Estate Exteriors
Exterior shots of homes, apartments, and office buildings are usually the very first images that photographers encounter when they take a look at a real estate property when they search property listings online. That’s why it is necessary to get images of the highest quality, making all first impression a good one.
There are two main layers of real estate photography, including the interior and exterior. The exterior pictures act as the first thing potential buyers see and then consider if they should move on to the rest of the house. This article is going to offer you some tips to compose eye-catching outdoor photos of real estate, making an excellent first impression.
Get a Well-prepared House for the Shoot
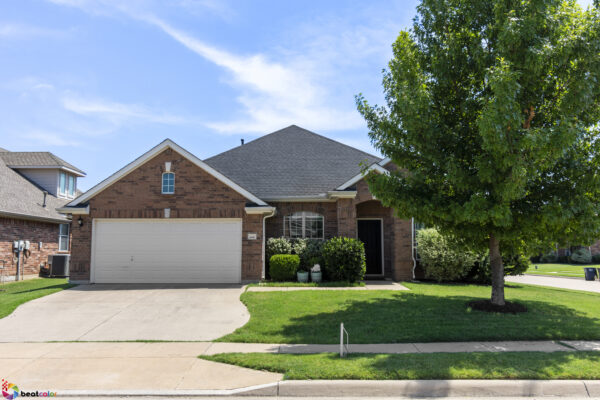
Set things up before taking any pictures, ensure the property is spotless in order not to only make final images more beautiful, but save you a lot of time on post-processing later on. What you can do for the outdoor space is to tidy the yard up, move cars out of the scene, and other unflattering objects like garbage bins.
The lawn should be freshly mowed and children’s toys should be picked up from exterior spaces. Then, you should leave a patio and lawn furniture clean and neatly arranged. Hide from the view to the extent unexpected things such as garbage cans, gas mains, air conditioning units, or storage sheds.
Take Advantage of the Sunlight during the Day
A good position of the sun will give the best possible light, showing off the exteriors of the home most effectively. Get to know which way the house faces and which moments are the best for the house. To make it sure, you might need to take many photos at different times of the day. While some properties have the front looking wonderful in the early morning, it is more appealing for the back of the home to be taken with early afternoon light.
The good light is when it is on the shortest from the house throughout the shooting process, usually the time furthest away from noon. It is because the sun at noon that is directly overhead will create highlights and dark shadows on the outdoor shots of the home.
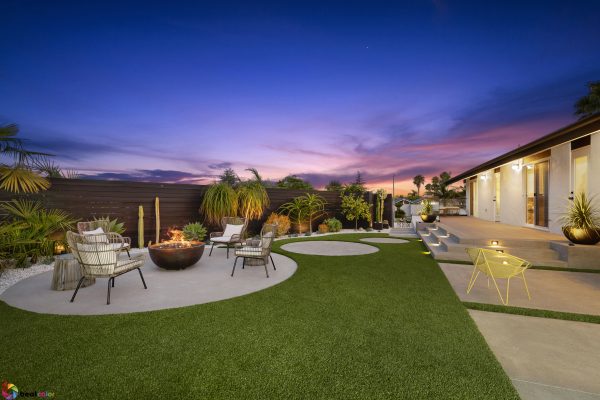
It is said that many homes become really alive when the sun is setting. To make the brightness of the property match that of the sky, switch on all exterior and interior lights as shooting. Showing off the house at different times of the day, both day time and dusk can upsell to your agents.
You don’t need to worry if it is an overcast day. The consequent giant diffuser will dissipate shadows from trees around the property and brings out nice lighting. Also, cloudy days will minimize the sun’s glare off the windows. Regarding the poor sky, the post-processing will replace with blue skies.
Lighting is one of the most decisive factors for photography in general and real estate in particular. Take more details about this topic in this article.
Figure out the Best Shooting Angles
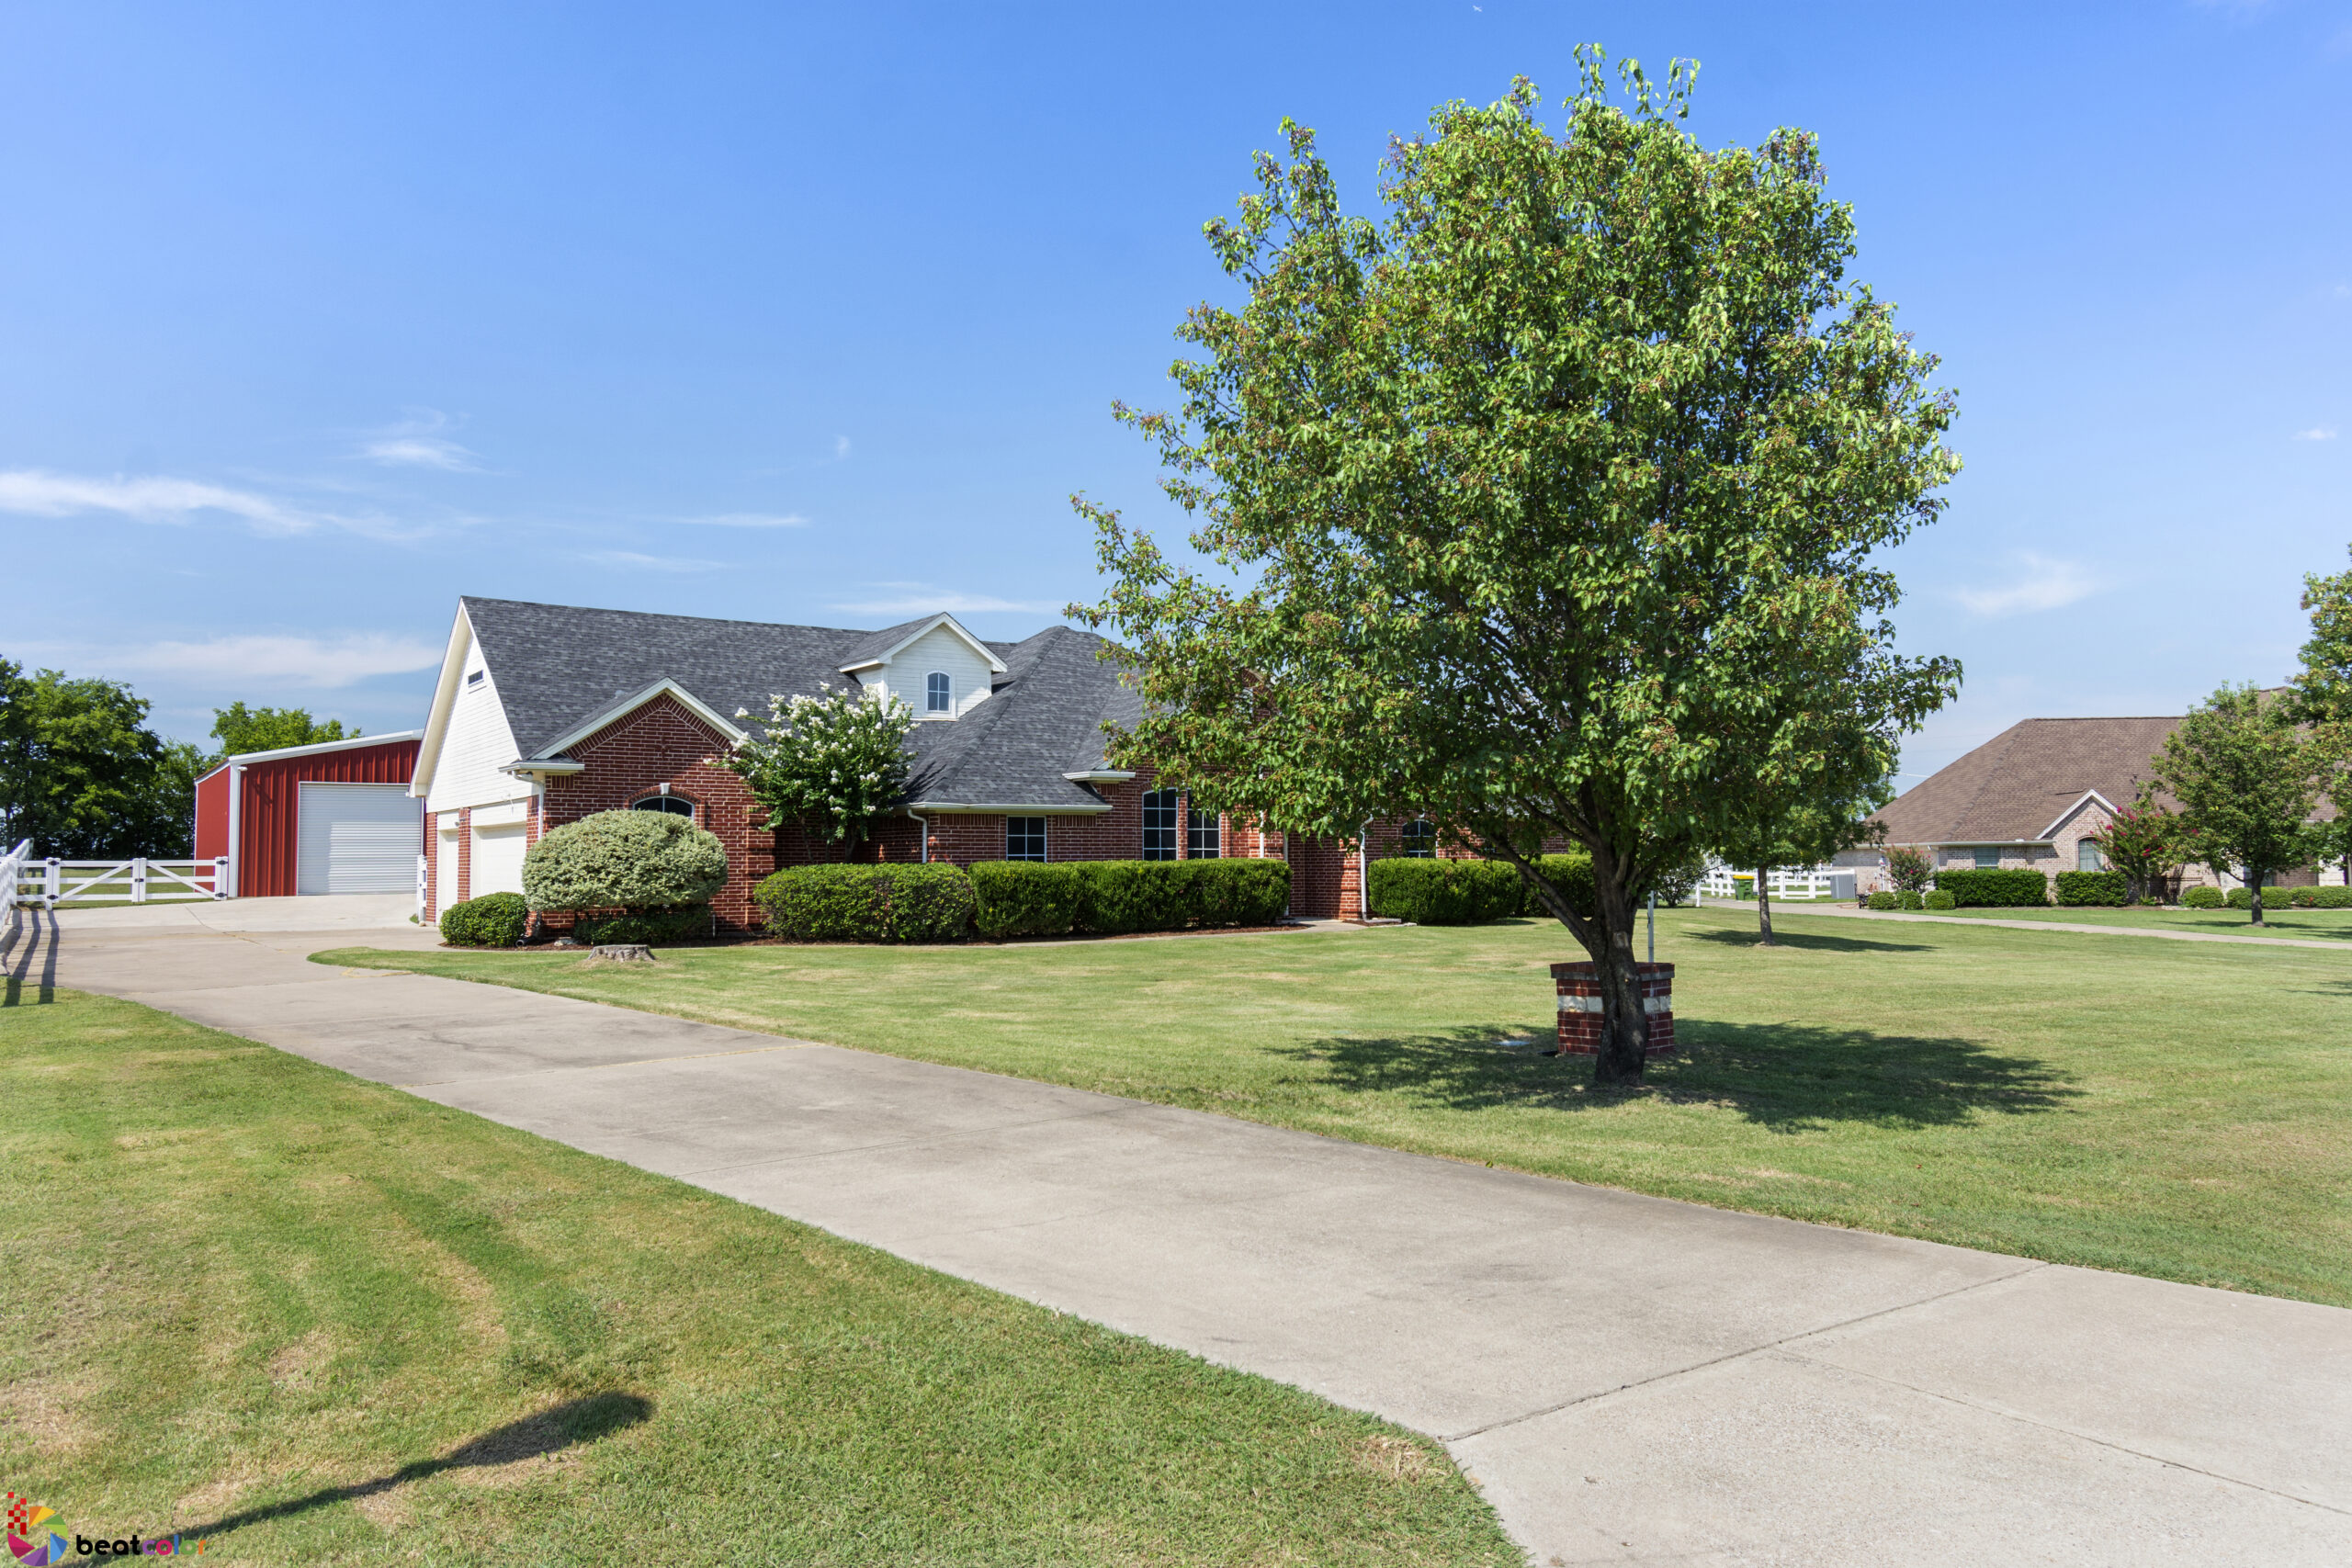
Each house has its own outstanding features that make your work separate from other real estate photographers. After taking “safe shots”, try at other angles to figure out those angles, then you can level up your work. For example, the featured exterior image of a home listing is often the one taken directly in front, but it is not true for some others. Or if you take the pictures from head-on, driveways or sidewalks often dominate the foregrounds. Then, you need to avoid highlighting concrete in your photos. Instead, it is more meaningful to highlight yard space and structural depth. You can do by shooting the house from an angle near the edge of the yard.
On the other hand, choose the angle that hides distractions. For instance, if neighboring properties are not very appealing, you should take shots in which you fill the frame with the desired home with the most relevant parts.
A tip is that a perspective from below or above eye level will make the photos more pleasing.
Other tips to shoot real estate exteriors
- – Prepare essential equipment like a tripod and camera’s timer. Tripod and camera timers are necessary to take photos with the sharpest results. Tripods can prevent your camera from shaking while you are shooting, avoiding being blurry final photos. And the tripod is a must for long exposure times, especially in low light at dusk.
- – Keep horizons straight and level. The home can appear distorted and sliding off the photo if the lines are not straight. To do this, you can a viewfinder alignment grid that can ensure horizontally and vertically level lines. The post-processing can help you with the imperfectly aligned horizon, correcting the perfective.
- – Highlight outstanding details. You can create unique selling points for real estate agents by including interesting architectural elements, showing its own personality. They could be a pool, pine trees, a stunning view over the window, stonework, or beautiful garden space.
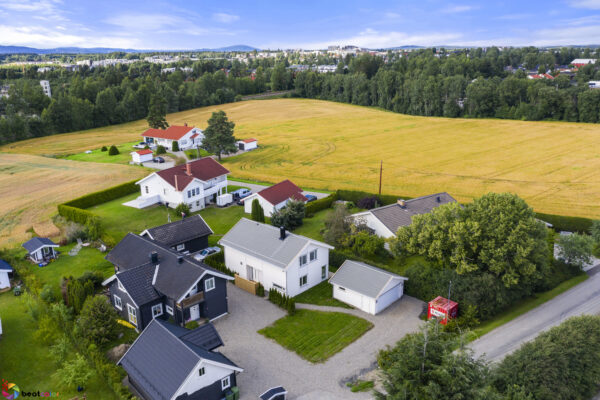
- – A drone for overhead shots of the property. The aerial view allows potential buyers to have a feel for the entire homes and its layout in relation to other properties surrounding. Just bear in mind that some states have strict laws about drone photography. You should check who can operate drones for commercial use. Make sure that you check with local authorities about licenses or permits to take drone pictures in specific areas. Let’s find out more about drone real estate photos.
Review and Retouching
As for shooting, the post-processing stage is also extremely important to get successful final exterior photos. Photo editing will help you remove blemishes, annoying reflections, brighten color, and enhance contrast, making a great difference. This is especially essential in today’s digital age when most home buyers find their potential homes online before paying in-person visits. As first impressions last, beautiful pictures are the doorway to make a successfully closed transaction.
Ideally, taking home photos is about creating a collection of images and telling buyers its story. But to get successful in telling these visual stories, it is needed planning and forethought. It is to select the best angle, appropriate time of day, and highlight traits to create the most pleasing photos. The final aim is to convince viewers to make a purchase.


