HOW TO DO TV SCREEN REPLACEMENT ON REAL ESTATE PHOTO ?
Working in the real estate photography editing field, we get a lot of requests asking us to replace the TV screen. So today, to help those who want to do TV screen replacement on their own but are wondering how to do it correctly, we decided to write this article to share the simple tips on how to insert a photo in Photoshop to the empty TV screen.
Let’s check it out
Preparation
You need to have an image which you want to add on the TV screen. You can choose natural images, beach photos or sunset pictures, or even another photo of your listing.
Here are some photos which we usually use for TV screen replacement

Now let’s start with the first step
Open both your interior photo with a black TV screen and the image used for replacement in Photoshop
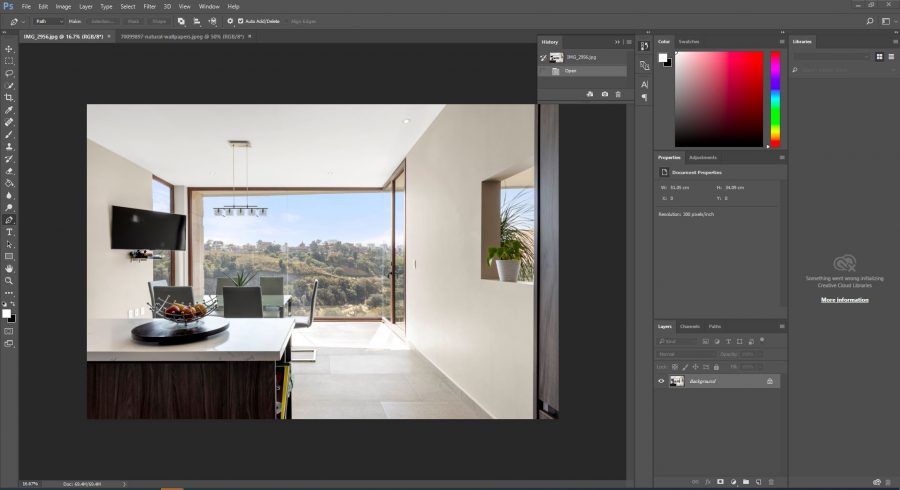
Next you create the selection path around the TV by using Pen Tool
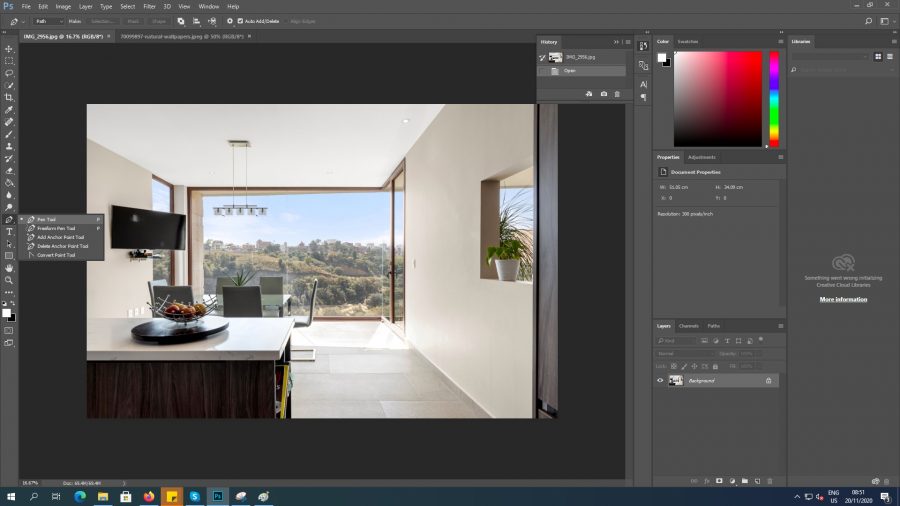
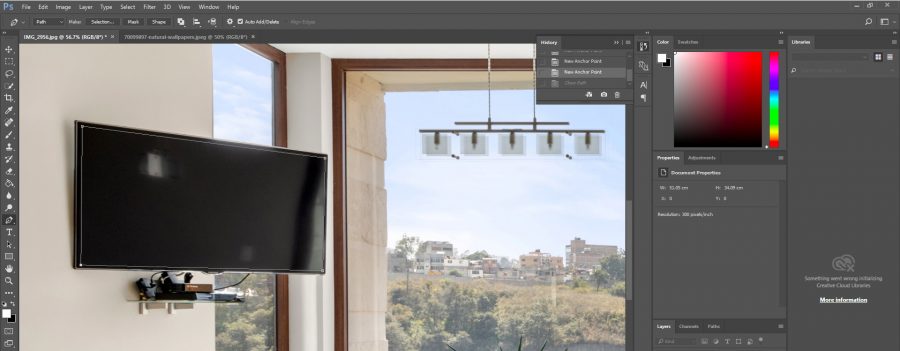
Then using Ctrl+Enter to select the path
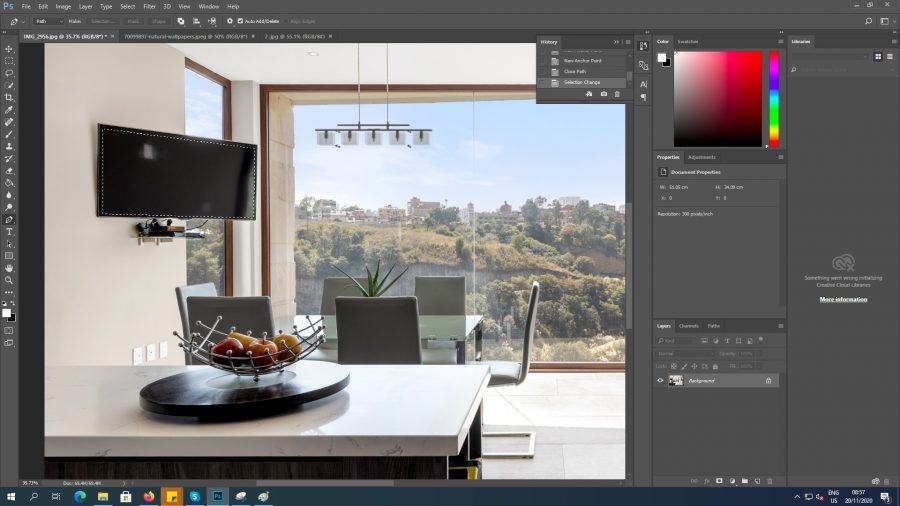
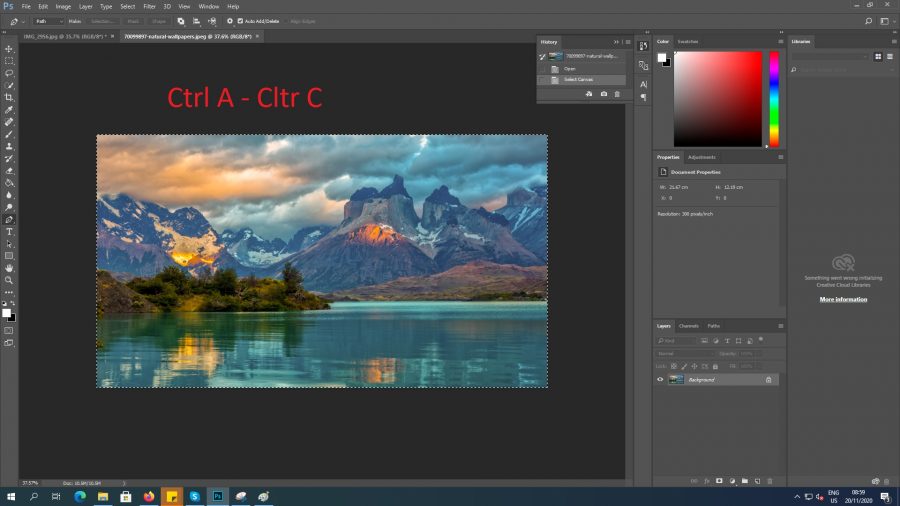
Now you copy the image you want to use for TV Screen, by using Ctrl+A , then Ctrl+C.
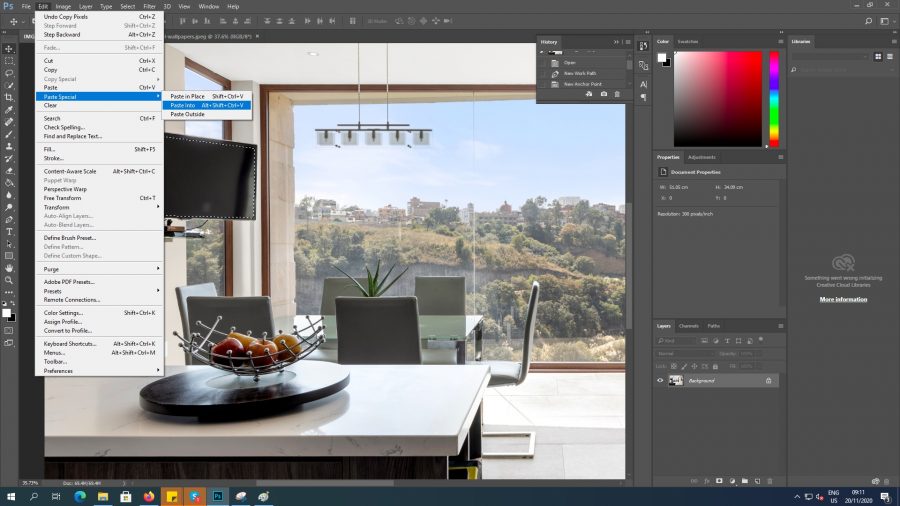
Open the main photo and use Alt + Shift + Ctrl V or you can click to Edit on the top bar, choose Paste Special, then click to Paste Into
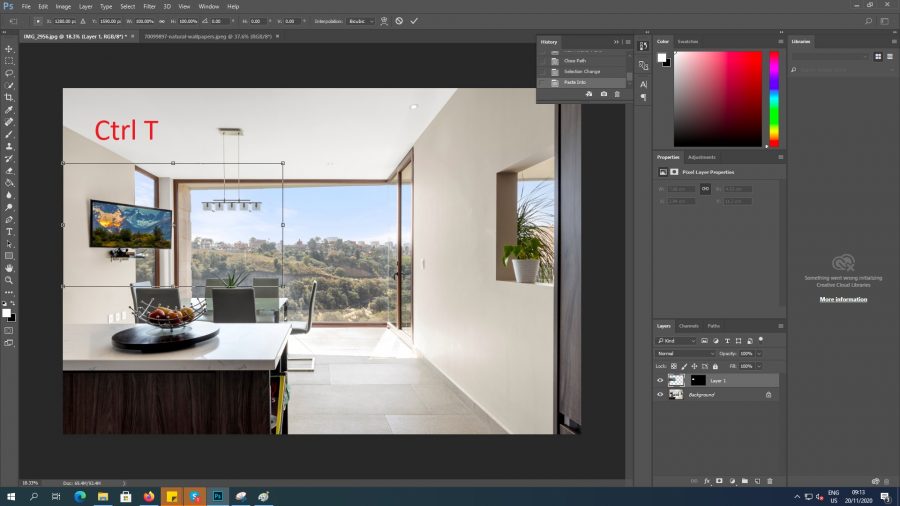
Now your image is on the TV screen. You can adjust the image by use Ctrl+T to drag the photo smaller.
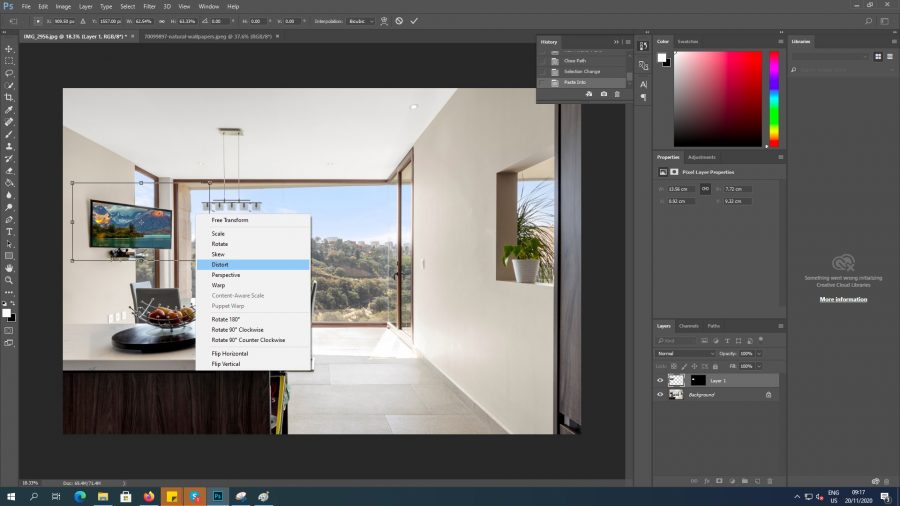
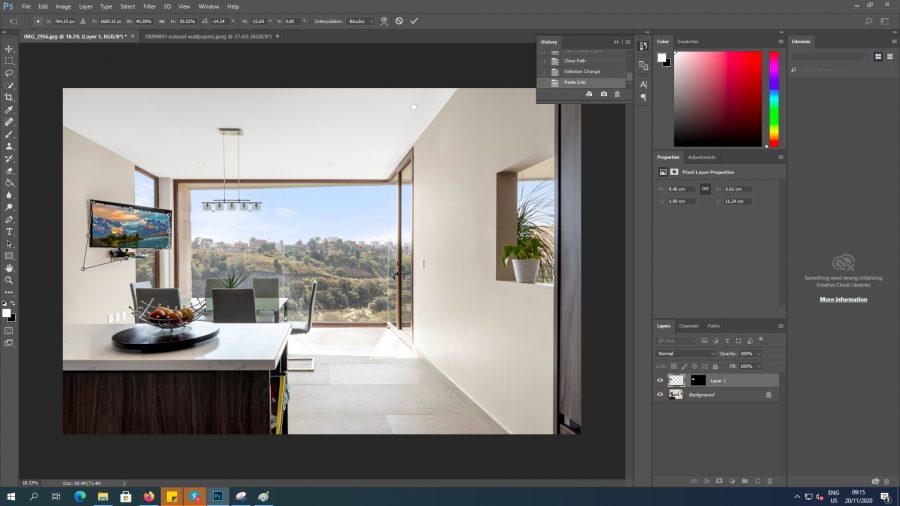
Now click on the right mouse and choose Distort to drag 4 corners of the photos with the corners of the TV.
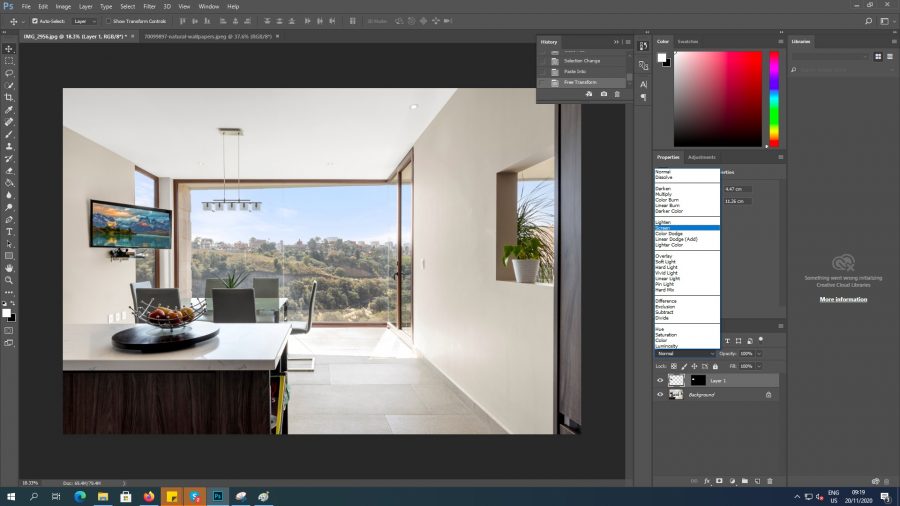
Finally, change the blending mode to Screen to create the screen effect. Reduce the opacity of the image to around 80% to make the image less intense and blend well into the TV screen.
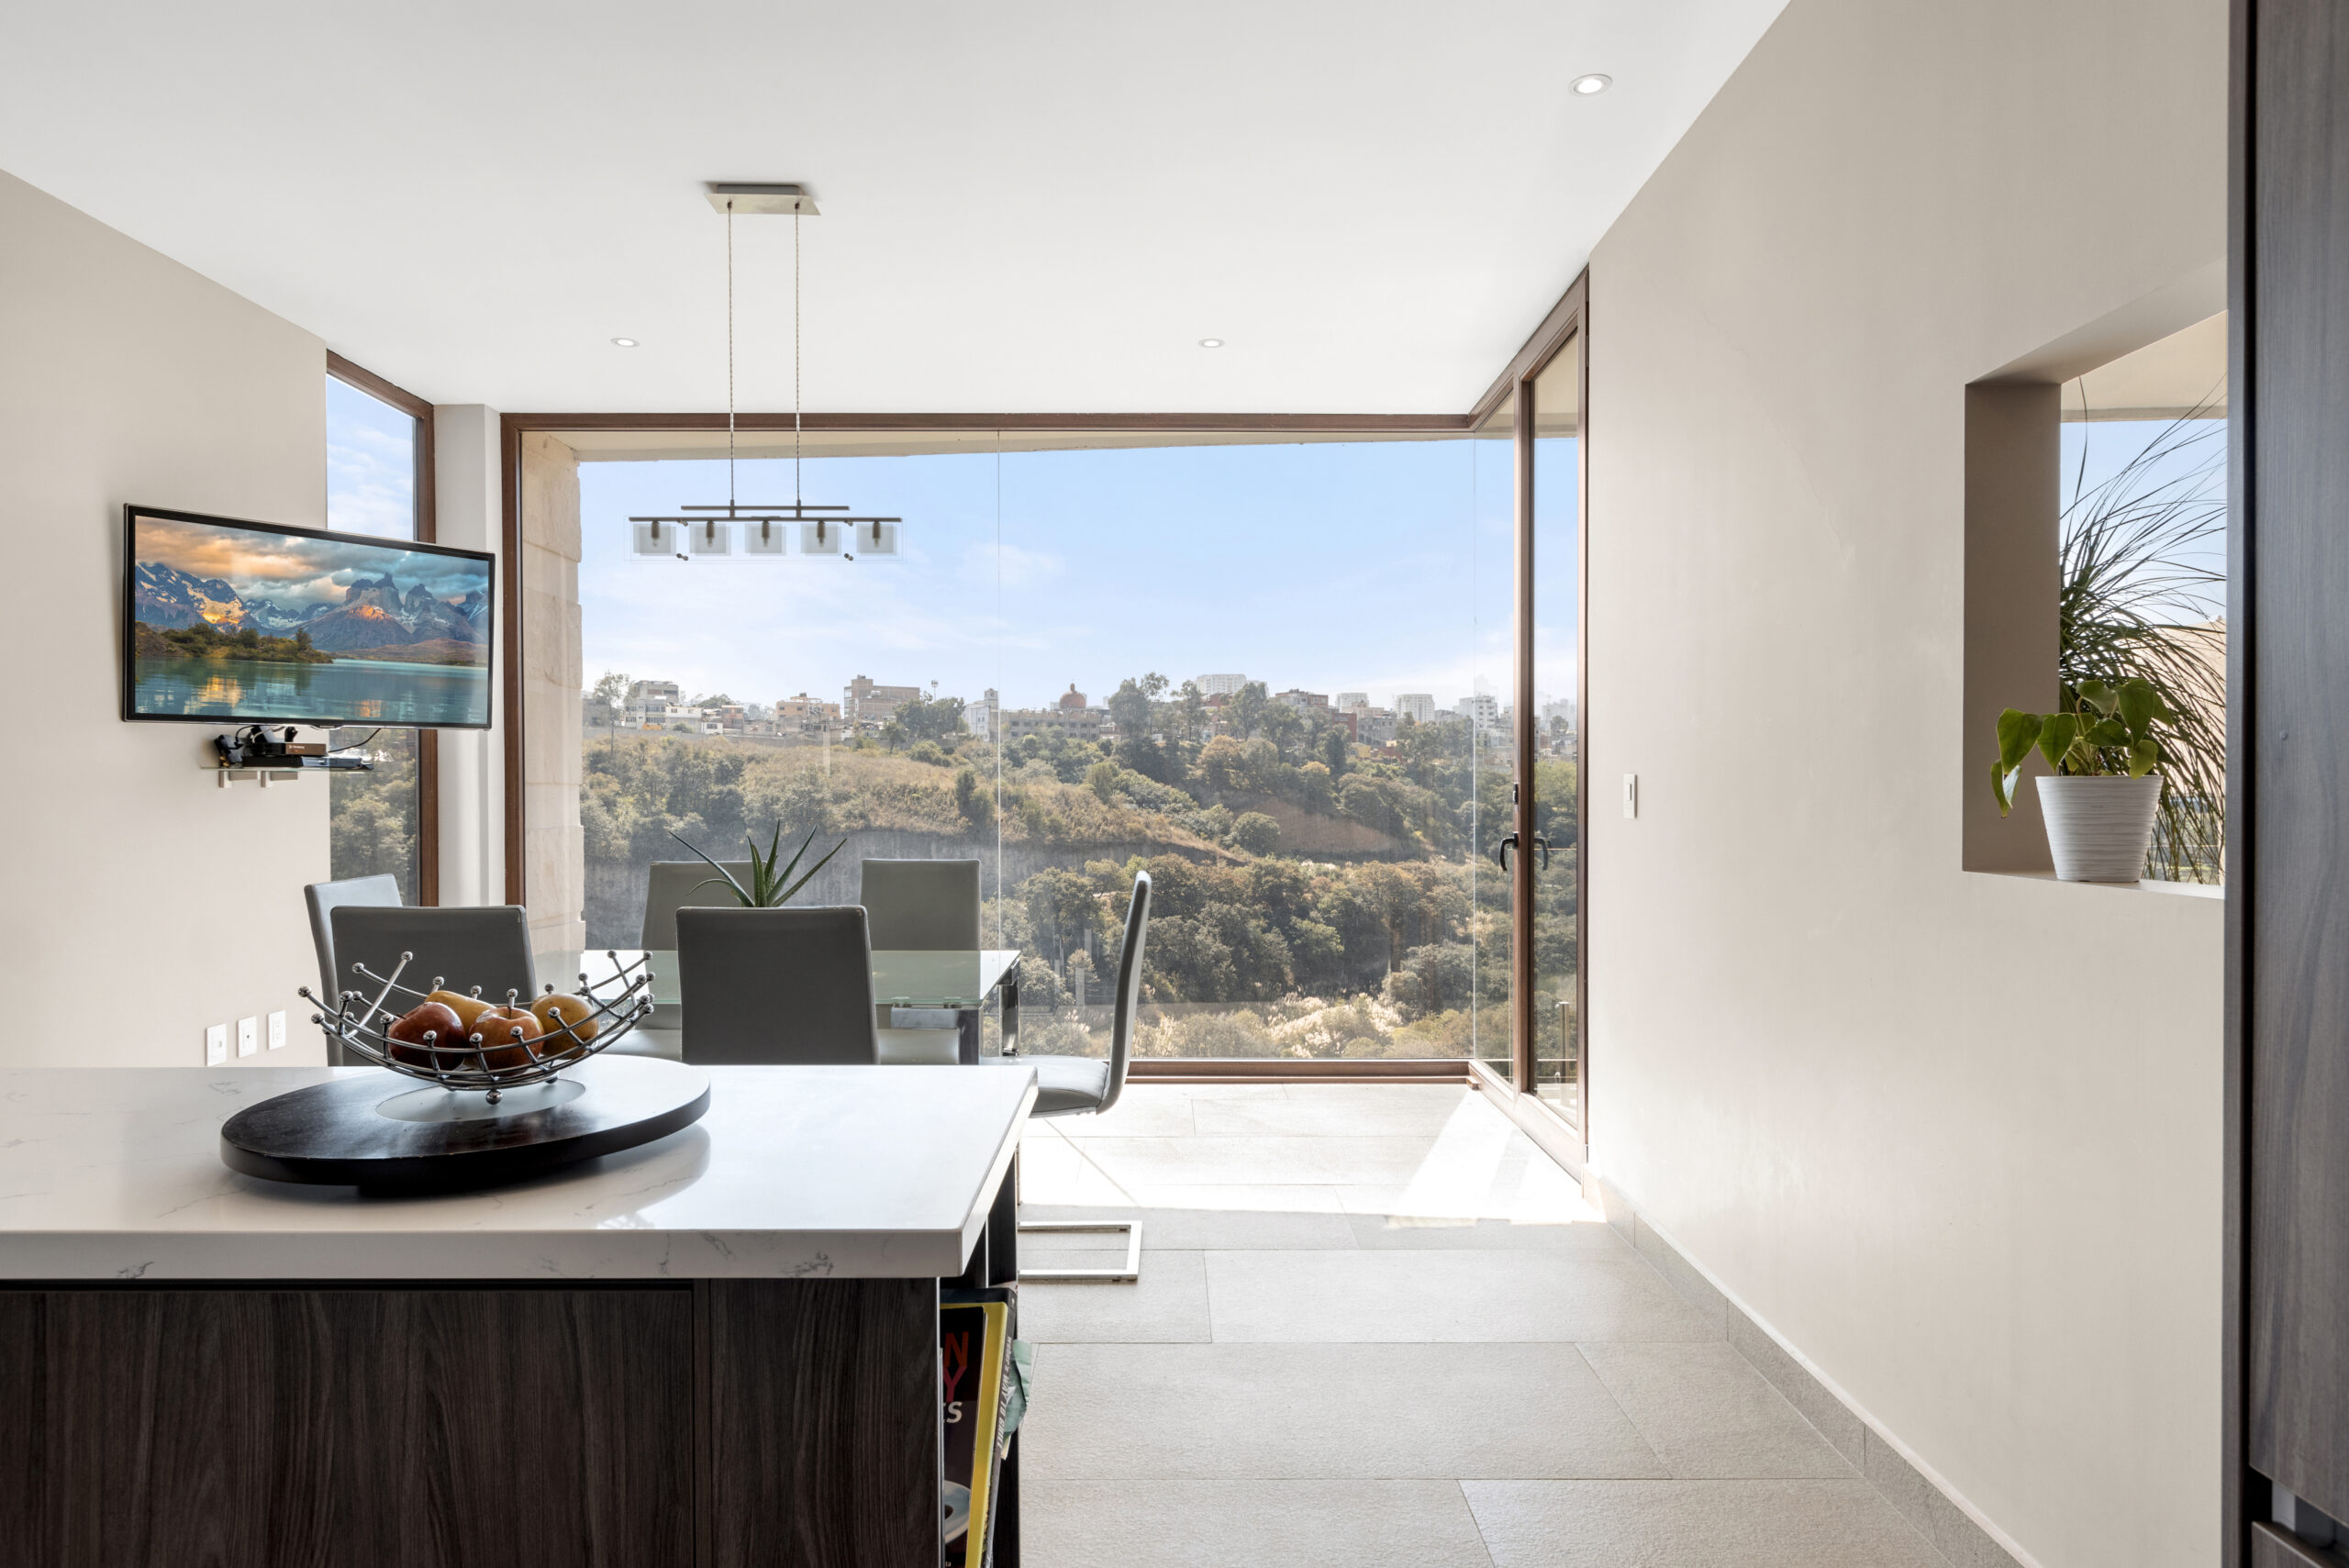
And here is the outcome.
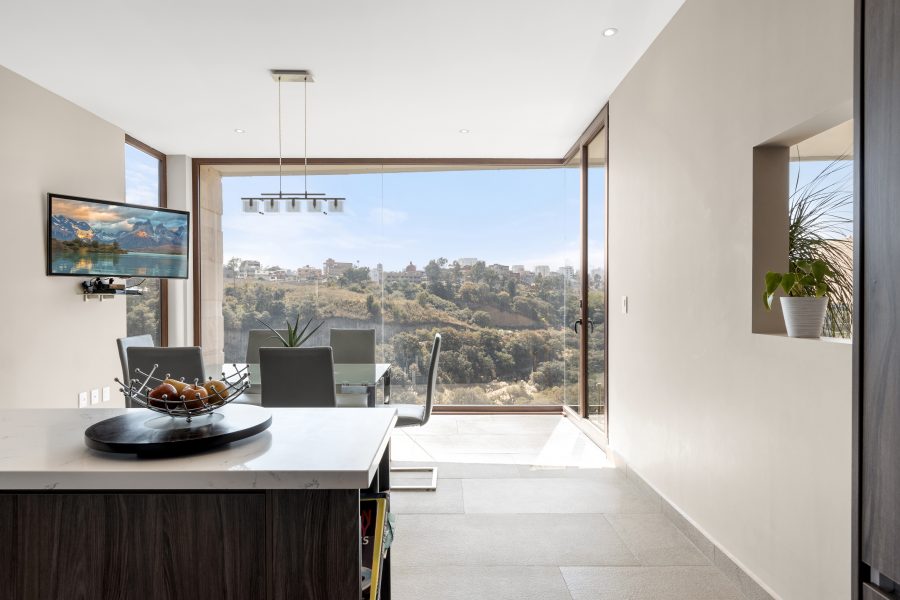
How easy it is! It is very simple and you can use it well. However, if you are busy and do not have time to do it, outsourcing photo editing service is a good way. At BeatColor, we do offer TV screen replacement under the Standard package. Feel free to contact us if you need any helps.


