
HDR Real Estate Image Processing Case Study: Achieving Natural Interior Lighting

A room can look beautiful in person and disappointing in a photograph. The reason is usually not the property itself. It is the gap between human vision and camera exposure. Windows can become white patches while corners disappear into heavy shadows. Meanwhile, warm lamps may turn orange, and neutral walls can lose their true character.
That challenge sits at the heart of Real Estate Image Processing today. HDR editing remains valuable because it manages extreme brightness differences. However, buyers increasingly expect images to feel realistic rather than heavily processed. Recent 2026 guidance reflects that shift toward balanced, natural-looking HDR results.
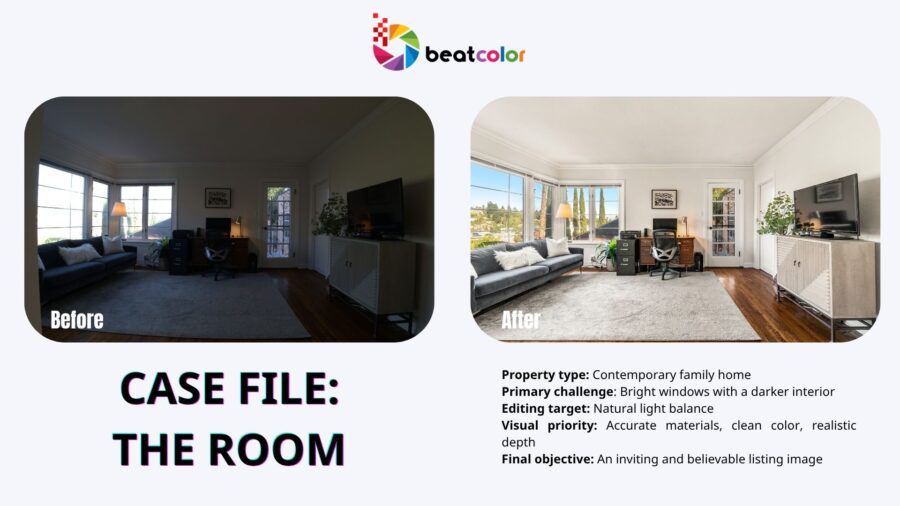
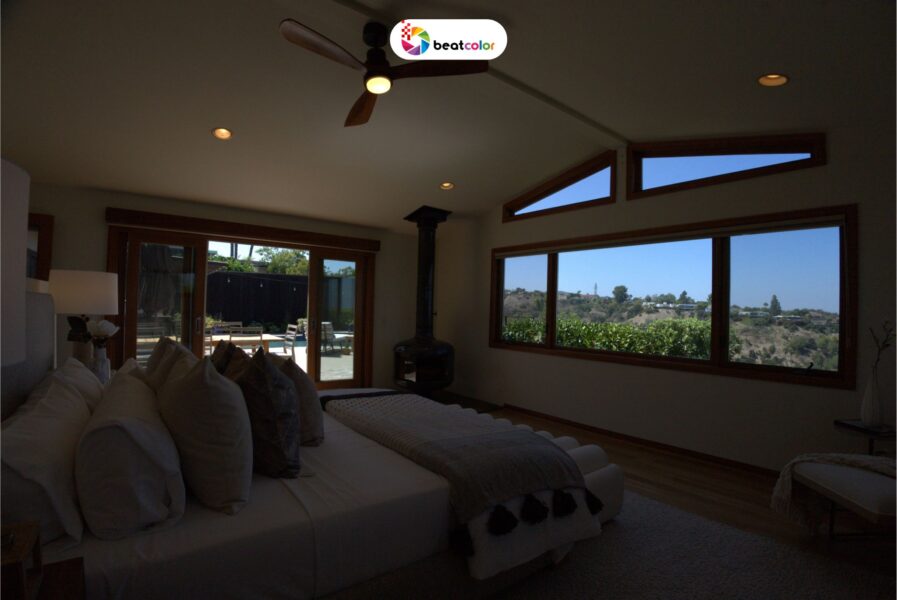
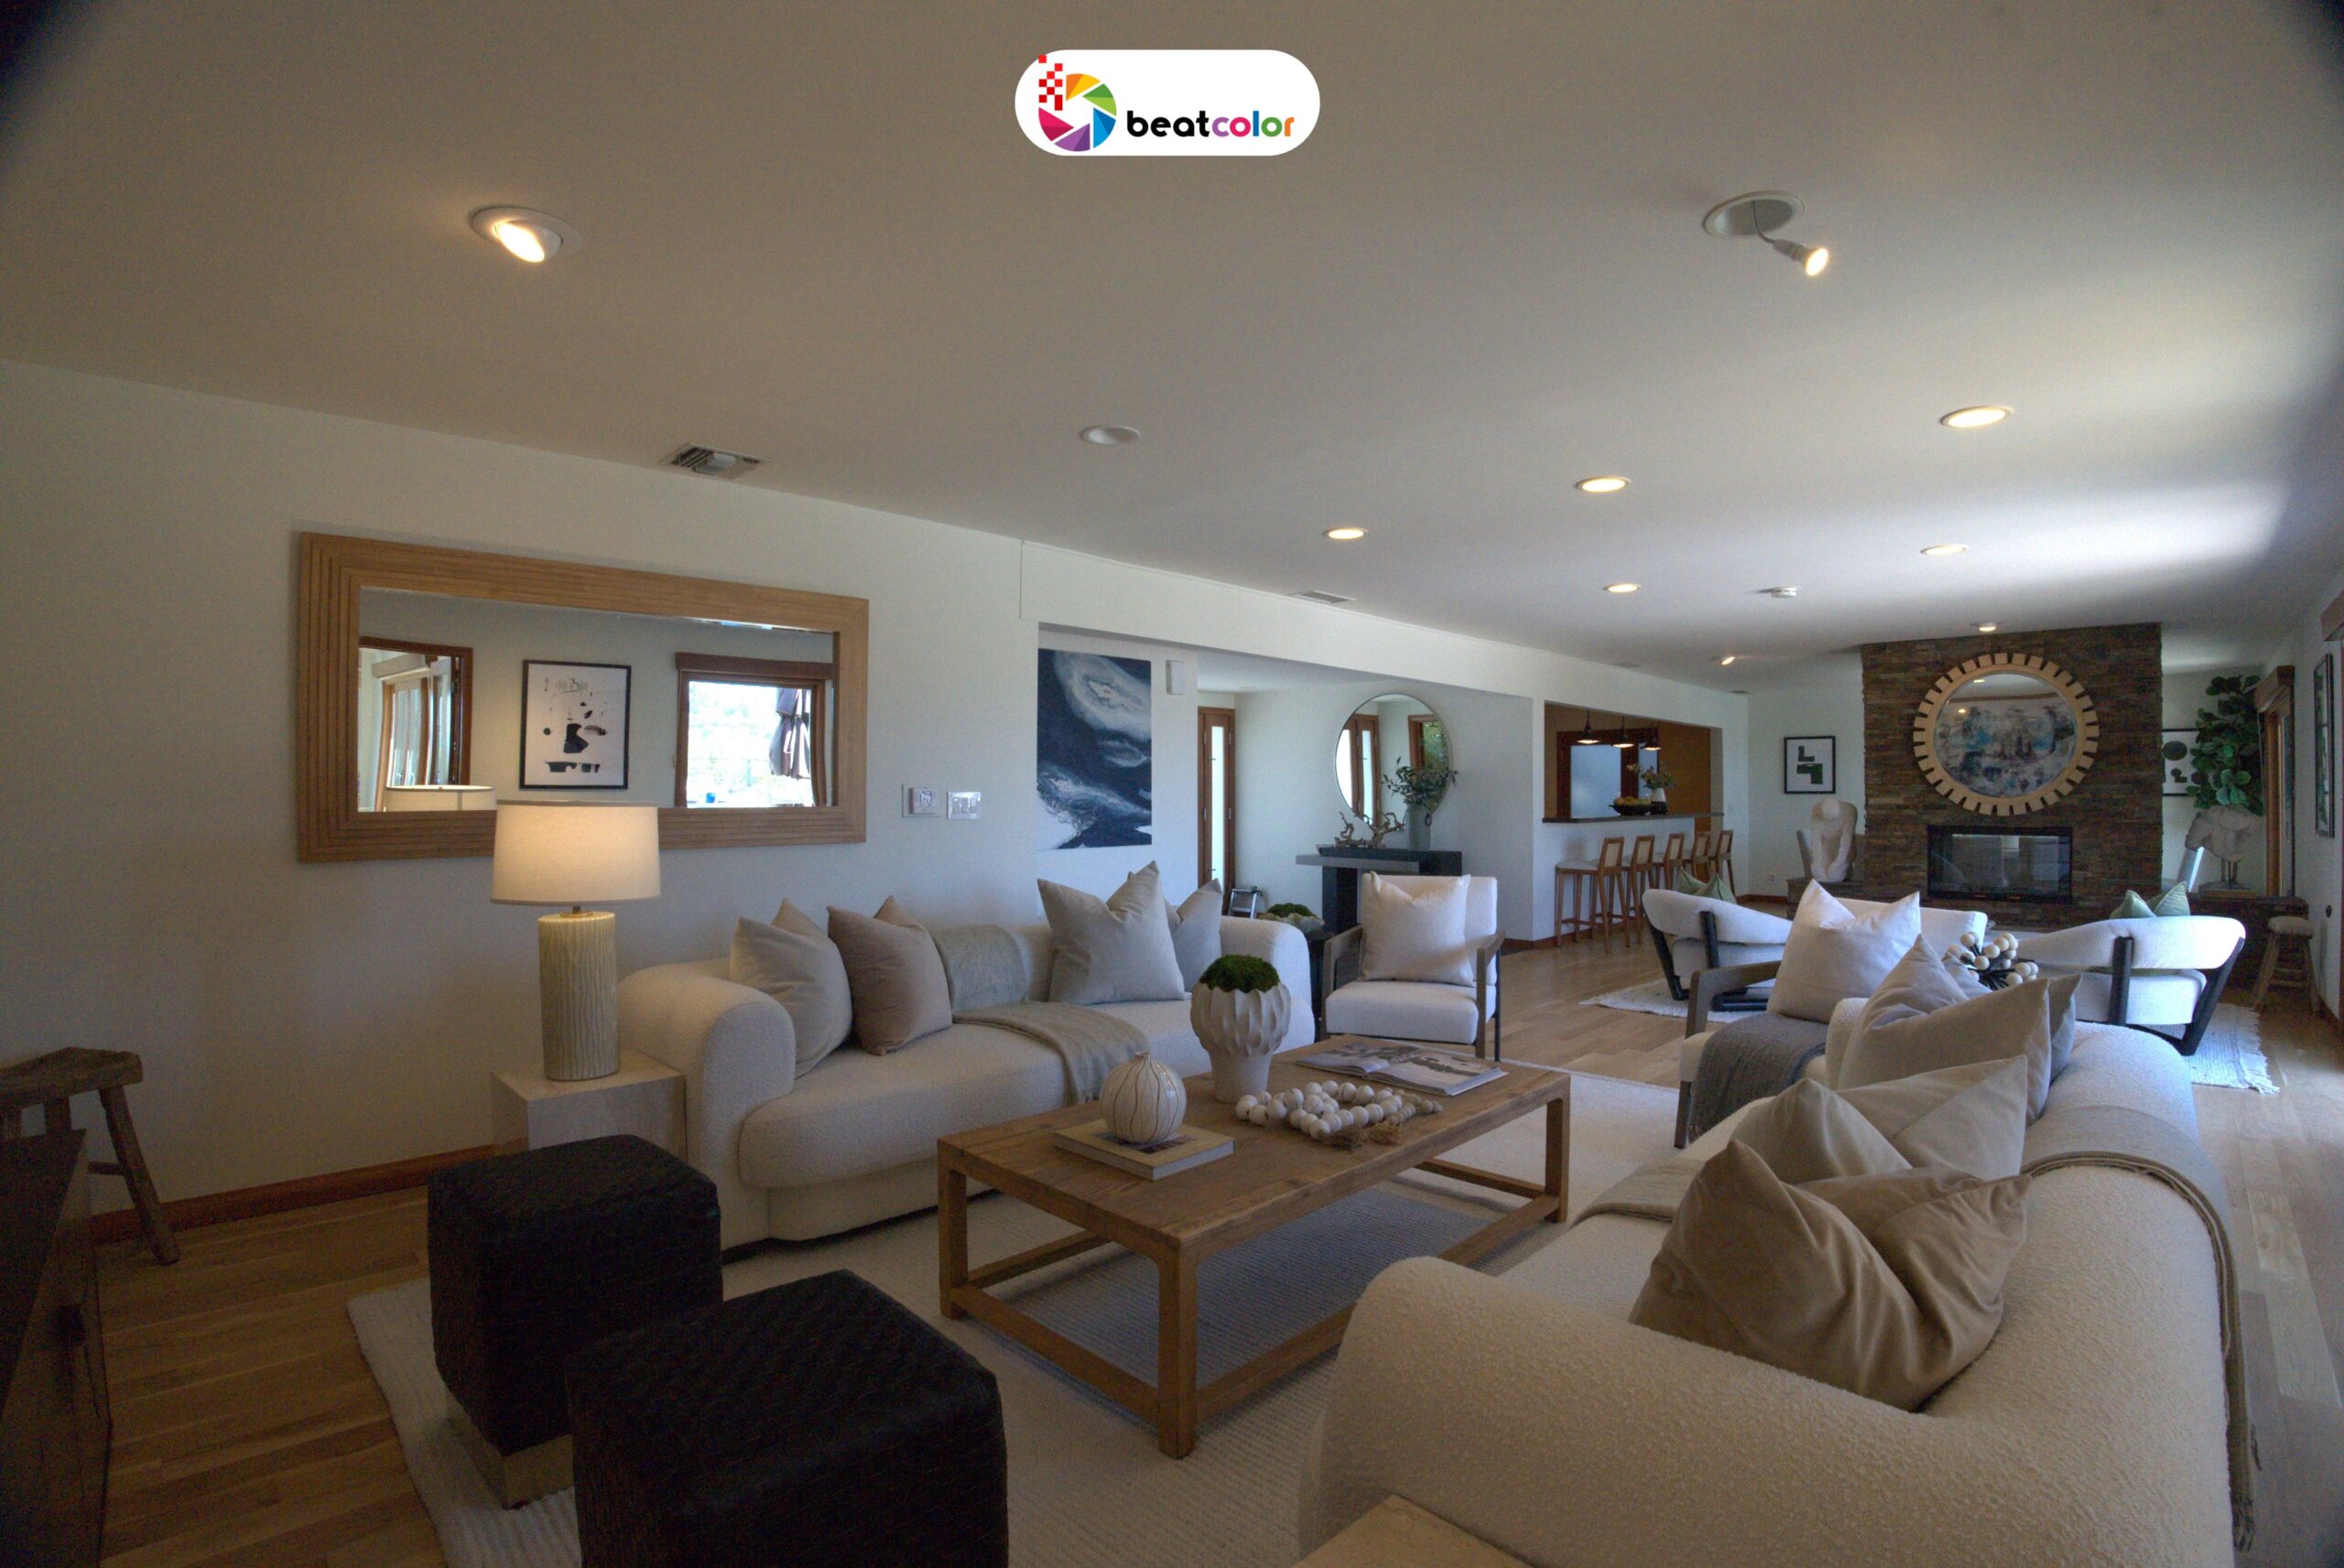
The original photograph showed a spacious living room with large windows. Daylight entered strongly from one side. As a result, the windows were close to clipping while furniture appeared comparatively dark.
A basic brightness adjustment could not solve the problem. Raising exposure improved the sofa and flooring, but the exterior became distracting. Reducing highlights protected the windows, yet the interior remained flat.
Therefore, the image needed controlled HDR treatment rather than a simple global adjustment.
STEP 01 – BUILDING THE EXPOSURE BALANCE
Traditional HDR workflows combine several bracketed exposures. Current 2026 guidance commonly recommends three to five frames for ordinary interior scenes. Darker frames preserve window information, while brighter frames recover shadow detail.
The first task was merging those exposures without obvious HDR artifacts. Excessive processing can produce halos, muddy contrast, and unnatural colors.
The final blend needed to resemble what the photographer remembered seeing. It did not need every detail at maximum brightness.
That became the central editing rule: visibility should increase without flattening the scene.
STEP 02 – PROTECTING THE WINDOWS
Windows are usually the hardest element in interior real estate photography. They can be several stops brighter than nearby furniture and walls.
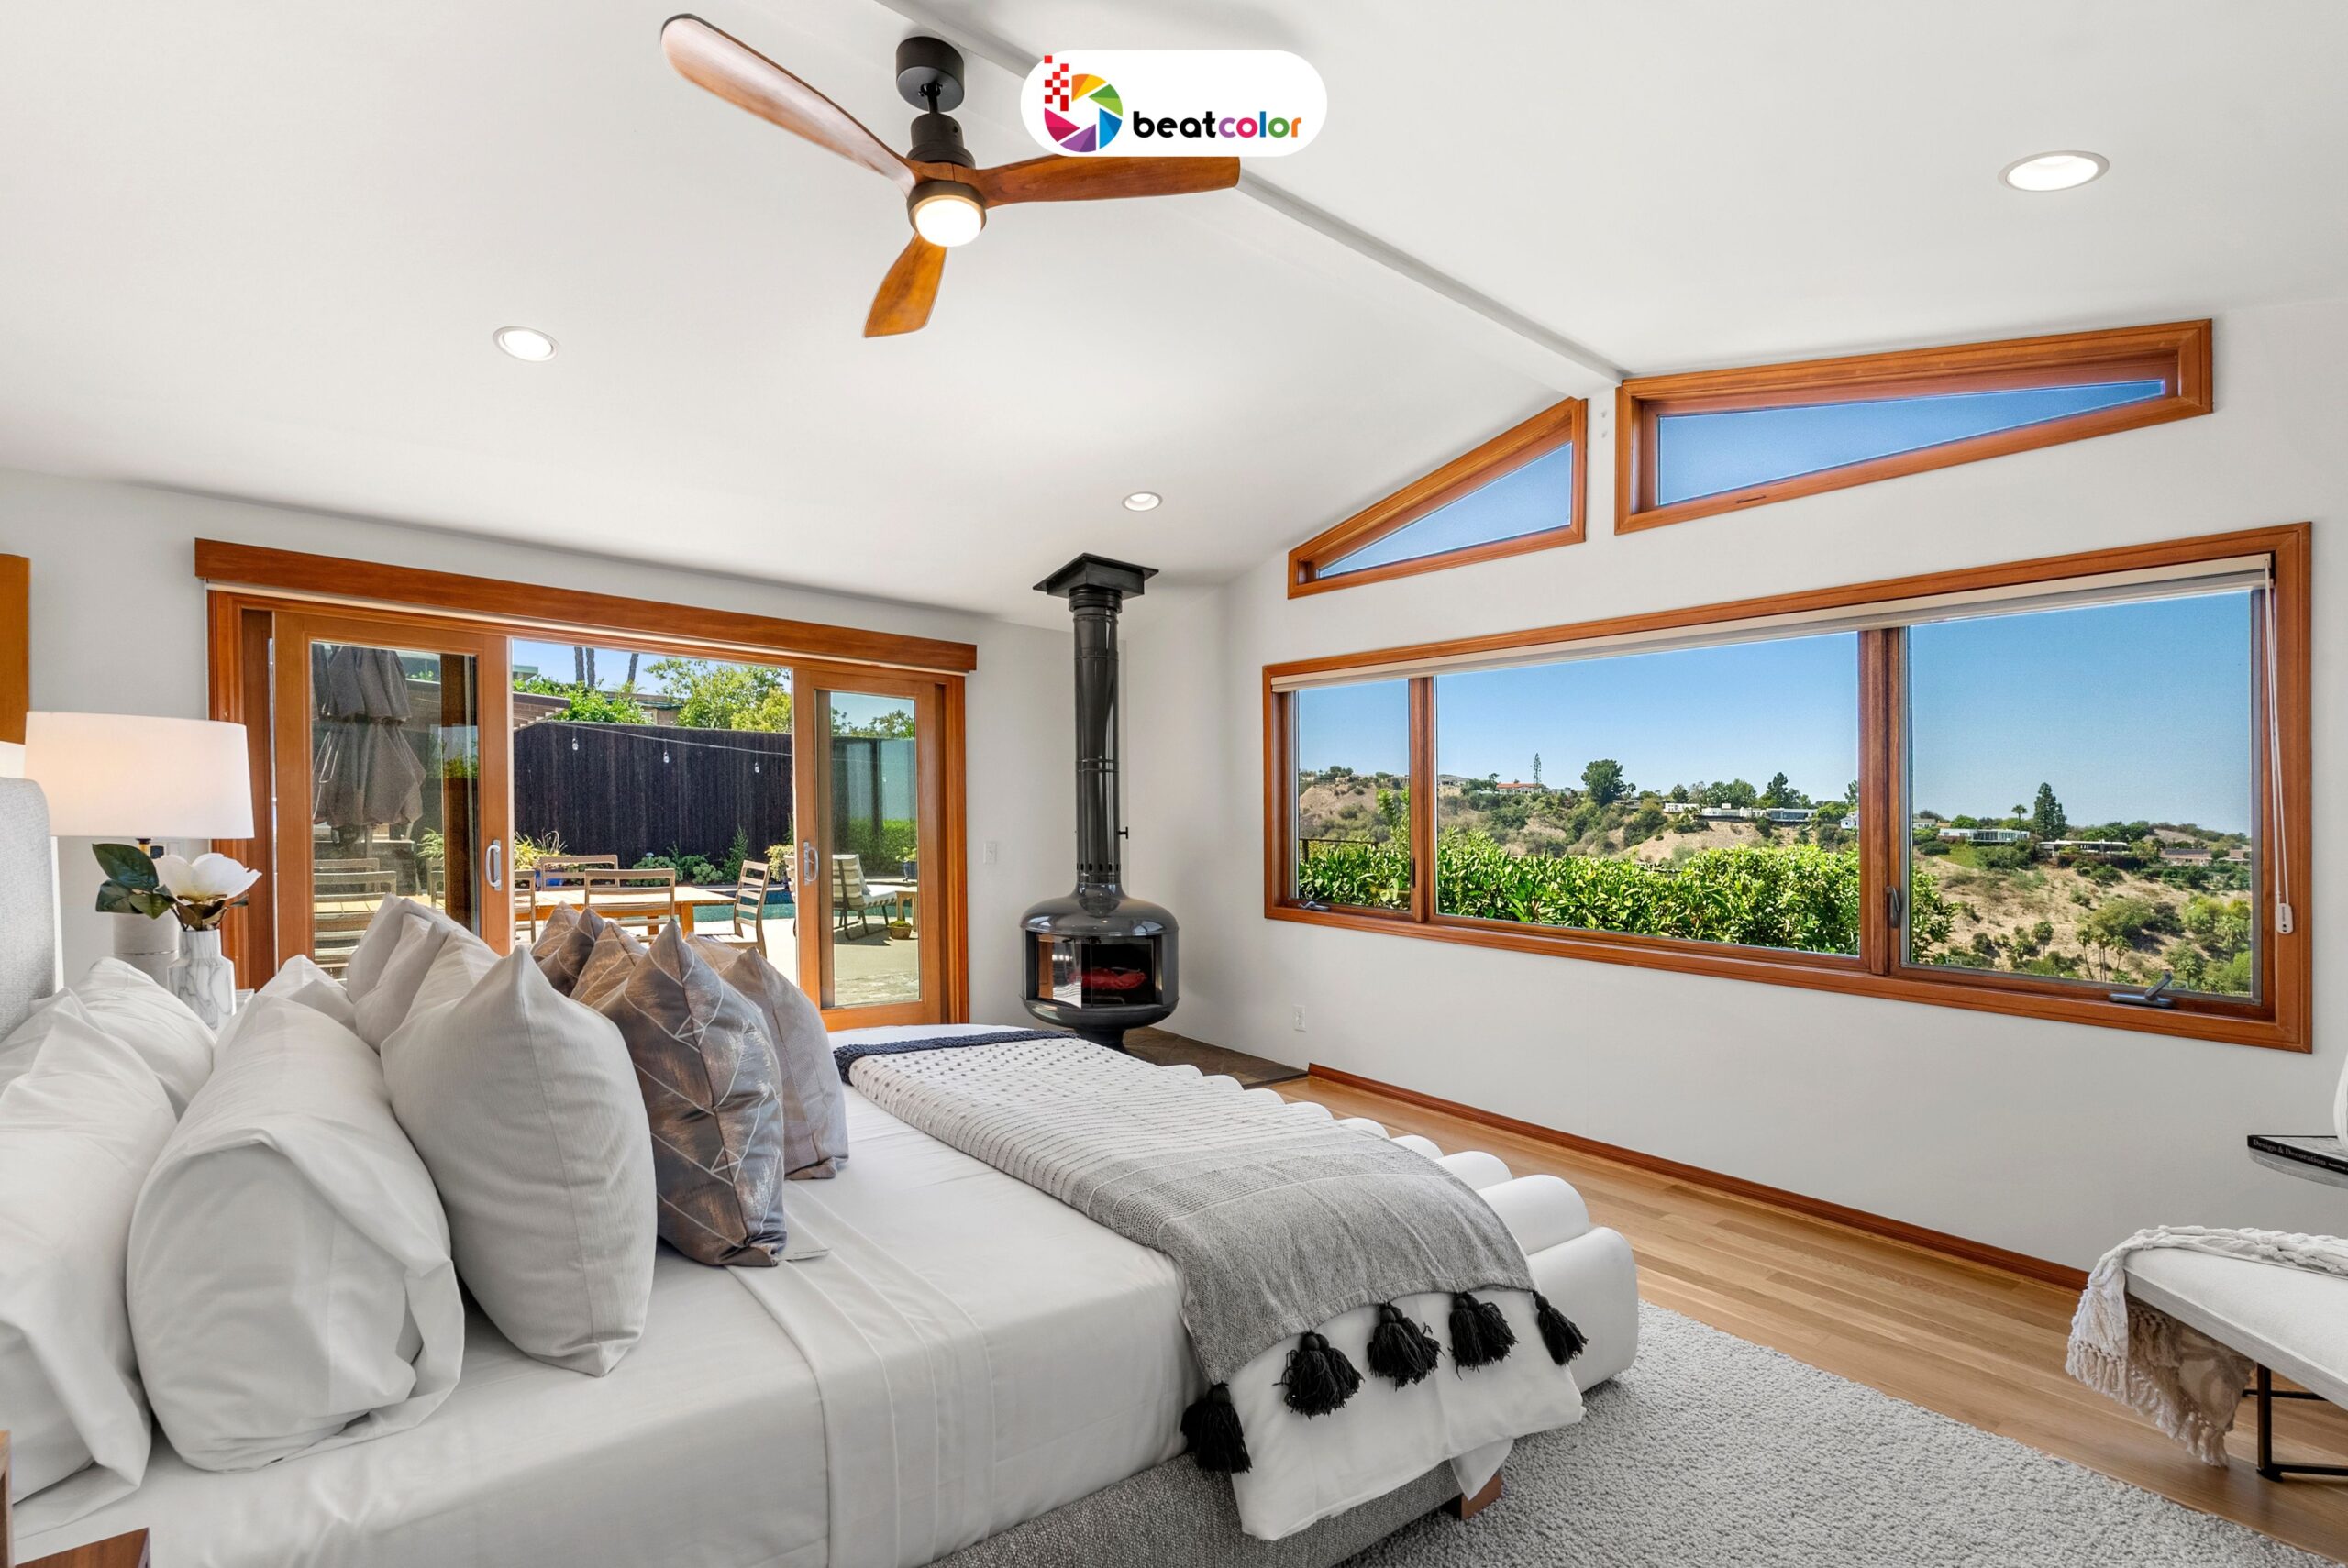
Instead of simply lowering highlights, the edit selectively controlled the brightest areas. Exterior detail was retained where the source files contained usable information. Meanwhile, the window frame remained crisp and accurate.
This created a believable relationship between indoors and outdoors. The view became visible, but it did not compete with the living space.
That balance matters for property marketing. Buyers need enough exterior information to understand the setting. However, the room should remain the visual focus.
STEP 03 – OPENING THE SHADOWS
The next challenge involved the darker parts of the room. Shadow recovery can quickly make a photograph look artificial.
Therefore, the adjustment was deliberately restrained. Dark furniture received more visibility, while deeper shadows remained present. This preserved depth and prevented the room from appearing uniformly bright.
The floor also needed careful treatment. Excessive shadow lifting can remove texture and make wood or stone appear synthetic. A controlled adjustment preserved natural tonal variation.
In practice, good Real Estate Image Processing is often about what remains untouched. The editor must recognize when correction starts damaging realism.
STEP 04 – CORRECTING COLOR, NOT REINVENTING IT
Mixed lighting created another problem. Daylight entered through the windows while warm fixtures affected nearby surfaces.
A single white-balance adjustment would have compromised part of the image. Instead, color correction considered different lighting zones.
Neutral walls became visual references. Wood tones remained warm without becoming orange. White furniture stayed neutral without looking blue.
This stage required restraint. Real estate editing should represent the property accurately. It should not redesign the property’s atmosphere.
That principle matters more as AI editing tools become easier to access. Current discussions increasingly emphasize the difference between enhancement and misleading transformation.
STEP 05 – FIXING PERSPECTIVE
Lighting was not the only problem. Vertical lines also appeared slightly distorted because of the camera position.
Perspective correction straightened architectural edges while maintaining the original composition. The walls looked more stable, and the room gained a cleaner presentation.
However, the correction stopped before furniture proportions changed noticeably. Overcorrection can make a room feel unnaturally tall or stretched.
When perspective correction works well, viewers rarely notice it.
THE BEFORE-AND-AFTER TEST
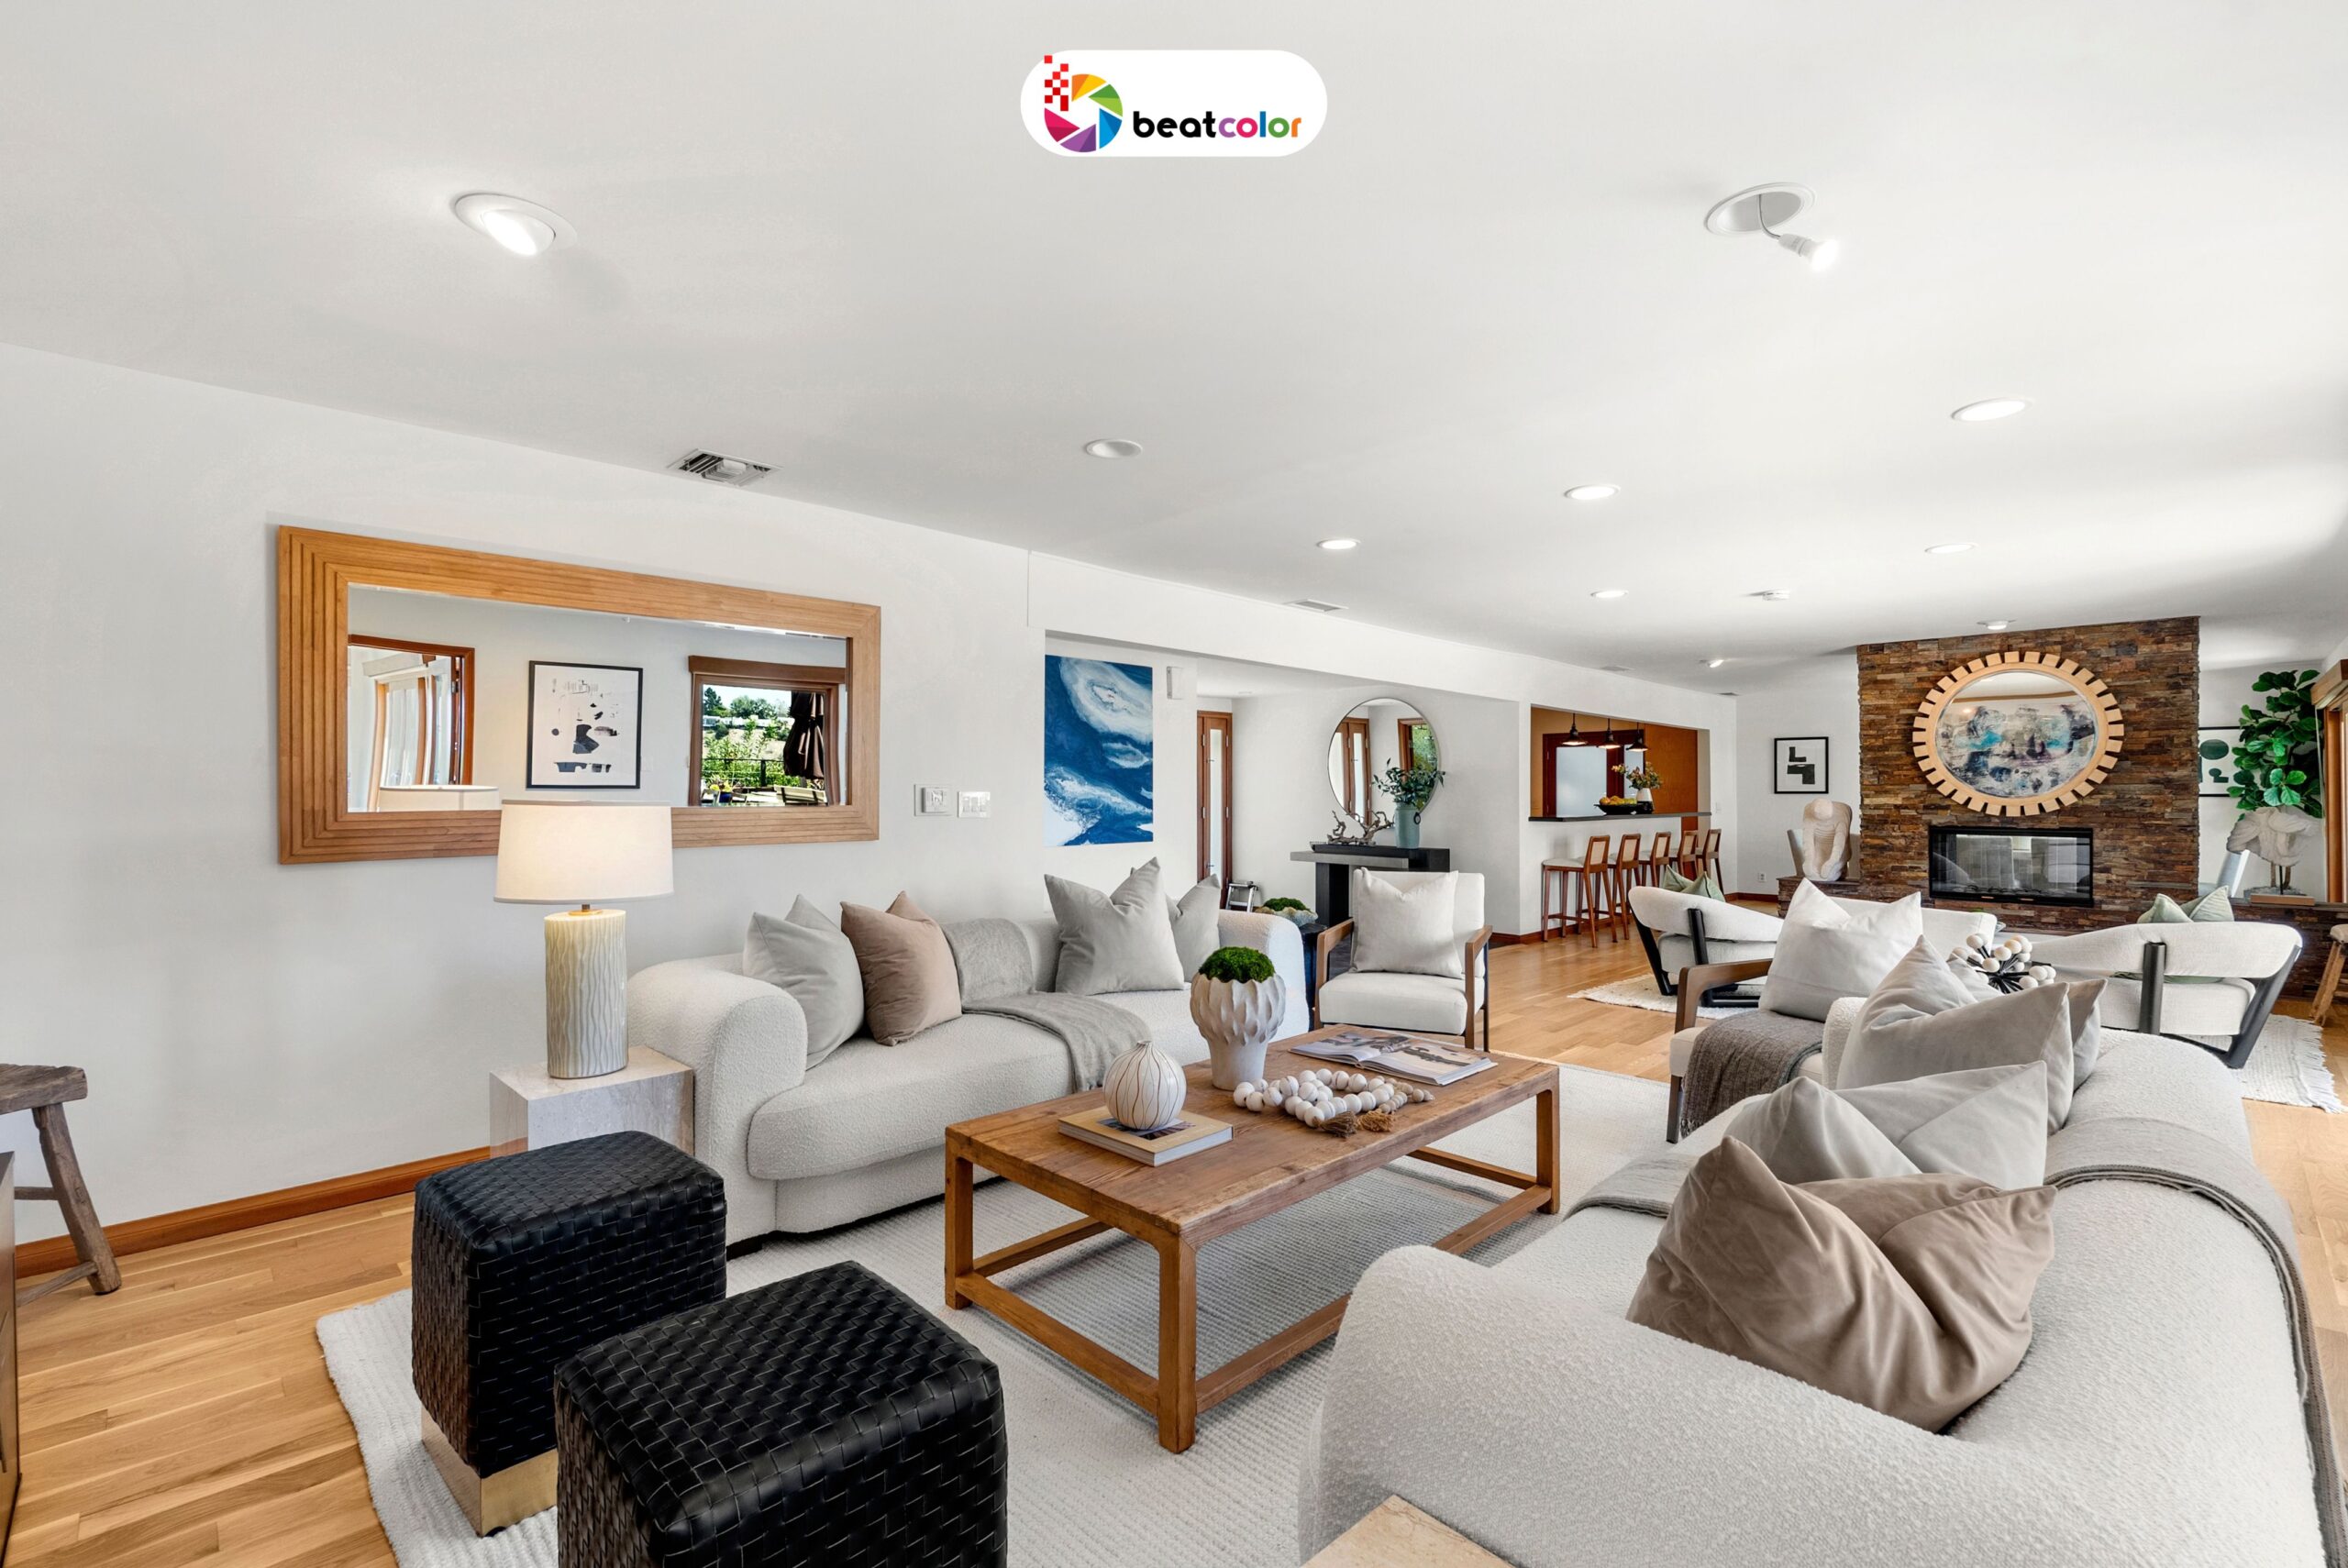
The finished image was compared against the original at normal viewing size. The first question was not whether the edited version looked brighter.
Instead, the test asked whether the room looked more understandable.
The answer was yes. Windows showed useful information. Furniture became easier to read. Materials retained their character. Lighting felt balanced rather than dramatic.
A second test reduced the image to a small thumbnail. This simulated how many buyers first encounter listing photographs.
At thumbnail size, improved tonal structure made the room easier to understand immediately.
REAL ESTATE IMAGE PROCESSING: WHAT MADE THE EDIT SUCCESSFUL?
The strongest improvement did not come from one dramatic slider adjustment. It came from several restrained decisions working together.
First, HDR recovered information from difficult exposure conditions. Second, selective highlight control protected the windows. Third, shadow adjustments improved visibility without removing depth.
Next, localized color correction maintained believable materials. Finally, perspective correction improved architectural clarity.
Together, these changes created an image that looked polished without announcing the editing process.
WHY NATURAL HDR MATTERS MORE IN 2026
The real estate image market is changing quickly. AI tools can now automate exposure correction, sky replacement, object removal, and other common tasks.
That speed is useful, but speed alone does not guarantee trustworthy imagery. Recent discussions around “housefishing” show growing concern about listings that look substantially different from reality.
For photographers and agencies, this creates an opportunity. Natural editing can become a competitive advantage because it protects visual credibility.
Google’s current guidance emphasizes original, useful, people-first content. It recommends valuable information and genuine expertise rather than content created mainly for search rankings.
That principle applies to real estate imagery too. A strong listing should attract attention while maintaining an honest relationship with the property.
REAL ESTATE IMAGE PROCESSING: THE EDITING CHECKLIST
Before delivery, every HDR interior image should pass several practical checks. Are windows detailed without looking gray? Are shadows open without looking washed out? Are whites neutral and wood tones believable?
Do vertical lines look natural? Are textures still visible? Does the room retain depth? Most importantly, does the photograph still resemble the property? If the answer is yes, the editing has achieved its purpose.
FINAL TAKEAWAY
The best HDR real estate photo editing is rarely the most dramatic. It is the version that makes viewers notice the property first.
For photographers, that means using exposure blending with discipline. For agencies, it means prioritizing consistency across an entire listing. For editors, it means understanding when to enhance and when to stop.
Real Estate Image Processing is moving toward a smarter balance between automation and human judgment. AI can accelerate repetitive tasks, but visual decisions still require context.
Natural interior lighting remains the benchmark because it serves both marketing and credibility. A brighter room can attract attention, but a believable room builds confidence.
That is the real lesson from this case study. Great editing does not make a property look different. It helps viewers see what was already there.
Read more:
Virtual Staging Case Study: Transforming an Empty Property
Real Estate Retouching Case Study: Add Items
Why AI-Edited Real Estate Photos Sometimes Look Fake