Flambient Real Estate Photography: How To Shot Window Pull
Flambient real estate photography, a fusion of flash and ambient lighting techniques, has become a paradigm in real estate and architectural photography for capturing spaces with natural-looking illumination. However, there might be a lot of confusion if you are a newbie in the real estate photography realm.
This comprehensive article today will delve into more exploration of window shots in flambient real estate photography and provide insights on up-leveling them.
A Definition for Flambient Photography and Window Pull
In real estate photography, flambient shot, with the classic combination of three exposures: ambient, flash, and window pull, is a stunning technique that flaunts the million-dollar value of properties. As a matter of fact, new photographers typically find it struggling to master this technique, especially, when it comes to window pull shots.
For those who don’t know, window pulls (or window shots) are exposures that salvage the natural color of the outside window or entrance scenery. This technique was born because, with normal techniques, the attention of potential buyers is withdrawn by the distortion from blur and glare. No camera can capture the view authentically and accurately as we see with our own eyes.

An example of multiple exposures
So, how to master this technique?
Set Up the Scene for Flambient Real Estate Photography
Real estate photography requires more preparation than any type of photography. A good scene preparation will produce exceptional work. Shared by experienced experts, keep in mind to always be aware of the weather and shooting time.
Make sure that in real estate photography, particularly indoor ones, natural light should always be balanced. The golden time for shooting in this field is early morning or late afternoon. When taking photos in other periods, it brings up harsh scenes, which challenge the beginner, sometimes even the professional photographer.
Bad weather limits the visibility of outdoor features and influences a buyer’s initial impression. Additionally, reduced natural light due to overcast skies can lead to more of reflection and glare in windows. Photographers should take thorough consideration to avoid the challenges presented by adverse weather conditions.
But in the unfortunate situation when photographers have to go through the motions to complete tasks in bad timing, it still can be saved by an exclusive editing service from BeatColor.
An example of Beatcolor Flambient Photo Editing
Still, it’s important to note that while editing can improve the overall look of real estate, it should not be done overly to maintain realism.
Set Up Your Camera For Flambient Real Estate Photography
The process of creating a successful “Camara Setting” takes a bit of trial and error. So, don’t be discouraged if it doesn’t work out perfectly the first time.
1. Manual Mode
The first step is to change your camera to the manual setting, which is marked “M”. To professionalize yourselves, there comes a time when you want to use this mode, as it allows for more flexible lighting control. This mode is especially useful when shooting with flash, backlighting, or in harsh lighting areas, including the window.
2. ISO
The best ISO suggested here is 250-400. Setting a low ISO may result in a bleak view from your flash, while a high ISO can introduce excessive noise. In addition, keep in mind that every interior needs a different ISO level, so it’s essential to examine the optimal ISO for your camera—a balance that ensures effective window illumination without compromising image quality.
3. Aperture
Most real estate photographers prefer setting the lens aperture wide, typically around f/8 or f/11. The Aperture value is noted as “A” in your camera. This choice ensures that everything within the frame is in sharp focus as the realtor’s desired quality. In this context, the goal is not to achieve a pronounced depth of field.
Change your camera mode
4. Shutter Speed
The shutter speed, denoted as ‘S’ on your camera, allows you to manage motion in the image. A fast shutter speed typically yields sharper photos, whereas a slower one gives photographers blurry results. The length of your lens will determine which shutter speed is precise. However, most things are motionless in real estate photos, so a shutter speed ranging between 1/100s and 1/250s is typically ideal in real estate photography.
Shooting for Window Pull in Flambient Real Estate Photography
1. Take a Tripod
The essence of flambient photography is to merge bracketed photos from the same angle with different positional lighting and light power. Therefore, it’s better to take a tripod to keep your frame steady. No camera movement is recommended during a bracketed shot.
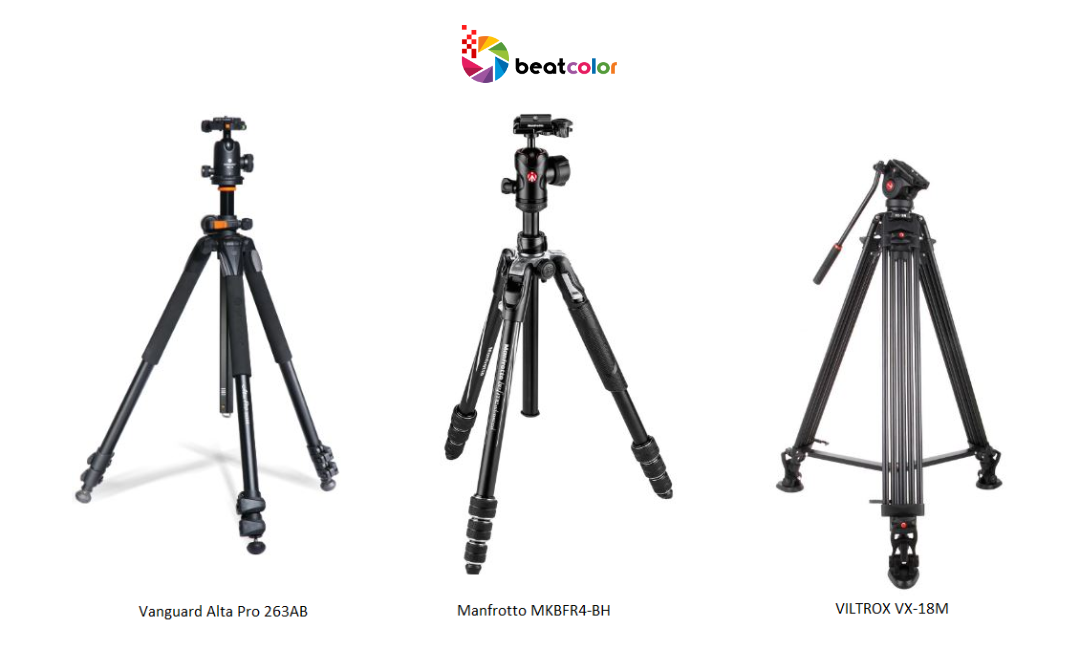
Some types of popular Tripod in Flambient Real Estate Photography
2. Use the remote to press the camera button
What we have to do is to aim the flash with ½ or ¼ power at the glass window (or door), and fire a shot. The flash will properly light the color of the window. Don’t worry if you find other parts of the room are not as expected, because, in this step, we only consider preserving a good window view.
A common issue is unexpected flash reflection imprint on the glass which may glare details as well. To address these challenges, all you have to do is change the flash angle while it’s still pointing to the door and, then generate another photo. The glare spot will disappear eventually when these two exposures are harmonized in the post-production of flambient photography method.
An example of how to aim your flash
Note: Remember that ambient and flash shots are also required. You can refer to how to take them smoothly HERE
Import Flambient Real Estate Photography to Lightroom/ Photoshop
At this step, you now have a bracketed photo with various exposure levels. How to turn them into realistic real estate photos?
Editing is where the real magic happens. It’s, in fact, a must that turns good Flambients shots into jaw-dropping photos. Take those tricky situations where glare messes with your window view and other color cast spots. With a bit of editing finesse, the window brings out the true colors of a space.
Below is an outline of the steps needed to merge flambient photos
- – Import all of your photos as layers
- – Align your photo to the same angle. This step will prevent the blur when you merge them.
- – Choose flash exposure on top, then add an inverse mask for it.
- – Change the flash layer to the dark to see the difference with the window layer.
- – Brush the white in the window in the mask
- – Flatten your image
- – Save your changes
You can do it by yourself with some free editing software HERE.
Read more: Photoshop Color Correcting Techniques In Real Estate Photo Editing
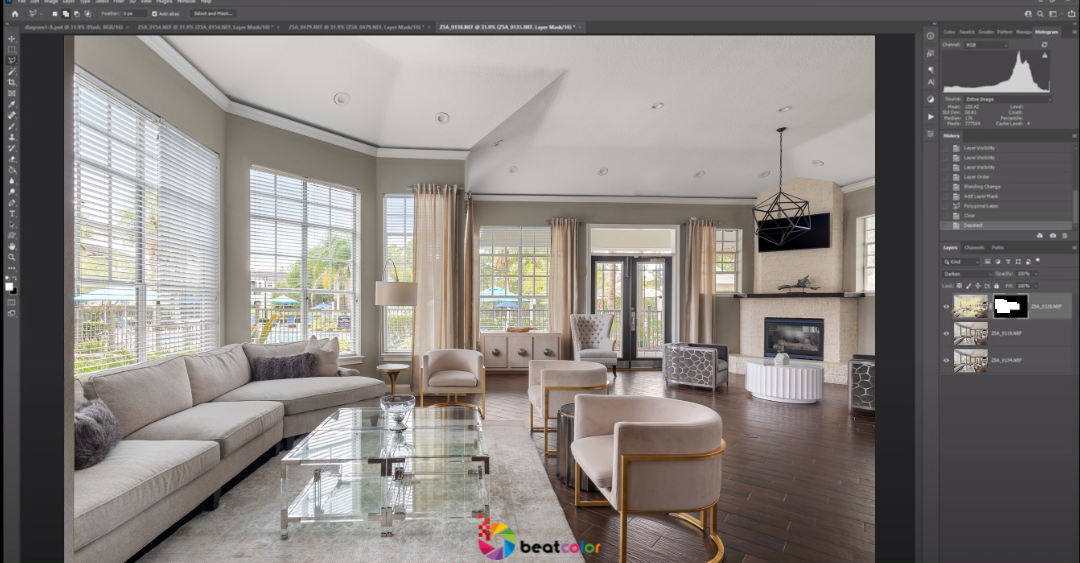
An example of The Flambient Photography Photoshop process
How to speed up your work for Flambient Real Estate Photography
“A flambient real estate photography project takes way too long if you’re on a tight time frame” This complaint happens all the time. The fact is that it does take a bit of setup, but once you get used to the process, it’s literally a few seconds per shot. We all know that outdoor views are the sweet spot of buyers’ tastes, so don’t get bounced out of the real estate industry by this technique. Remember “Practice makes perfect.”
As for editing, the process is indeed time-consuming and quite challenging. The hardest thing here is that even though you have great Flambient photos, still the problems of balancing exposures and refining colors naturally remain.
For real estate photographers looking to commit workflow with high-quality edits, the simplest solution to this is OUTSOURCING. Working with a professional editing team like BEATCOLOR is a paramount choice. BeatColor is confident to come into play as top-tier real estate photo editing. With dedicated assistance, your Flambient real estate photography will definitely be transformed into an extraordinary work from US $1. Well worth the extra money you can charge for an upgraded shoot.
A skilled example of Beatcolor Flambient Photography Photoshop
Final Thoughts
Flambient Real Estate Photography is one of the most important techniques in the field. It transforms photos into powerful marketing tools, and choosing the right editing team – BeatColor is key to ensuring excellence — let your Flambient photography stand out in this competitive market.
Related Posts:
What is Flambient Method for Real Estate Photography


